Skip to content
  • There are no suggestions because the search field is empty.

Create and Send Your First Card

00:00: In this video, I will guidde you through the process of creating and sending your

00:04: first card.

00:07: To begin, make sure on the main dashboard of ink.com.

00:09: It should look a little something like this.

00:13: To start, click send a card on the sidebar on the left of your screen.

00:18: Once you've arrived click on, create new card, to start the process.

00:22: We will now begin the process of composing your card.

00:25: Starting with the card cover selection stage.

00:27: Here you can upload your own image or design or choose from one of our many

00:31: templates.

00:34: If you are looking for specific type of card, you can narrow down your choices by

00:38: selecting a category from the top bar.

00:41: Once you selected your Preferred Card, cover, click next on the bottom, right.

00:47: Now, it's time to create your first Contact here.

00:49: You'll fill the form with your contacts first and last name, address city state and

00:55: postal code.

00:57: once you fill out the basics you can add a tag to their contact, this list initially

01:01: will be empty until you create some

01:14: Once you have completed the form and double checked, you enter the correct

01:17: information.

01:17: You can click save contact in the bottom right corner.

01:21: To add more recipients to your list.

01:23: At this stage, click on new.

01:24: In the top Center, this will prompt you with the same form to fill out for your new

01:28: content.

01:30: Once you're satisfied with your recipient list, click next to continue.

01:36: Now that you're on the Note step, you can write your message or if you are unsure or

01:39: struggling with what to write user, help me write feature and you can prompt AI to

01:43: write your personalized, note or improve your draft.

01:47: I will now guidde you through a brief overview of some of the features in the step.

01:51: First, the fonts are located at the top left corner displaying various handwriting

01:55: style for you to choose from.

01:56: If you find when you like the most, be sure to favorite it by clicking on the star

02:00: on the right.

02:02: Next up fonts you can find text size and Alignment.

02:05: Also a choice of a half note, which I have currently or a full one.

02:11: On the right hand side of your screen, you have the option to add a QR code for your

02:15: recipients to scan, directing them to a link of your choice.

02:20: Then we have placeholders, which allow you to send multiple copies of the same card

02:23: to different recipients without needing to create a new one each time.

02:29: Next is the option to select from one of our doodles to place in the bottom right

02:33: corner of your card, for an added Personal Touch.

02:37: And finally click signature to insert a signature element into your card design.

02:43: To learn more about these features, be sure to check out the links in the document.

02:46: Once you are satisfied with your card, you can click next to begin the final review

02:51: before sending it off.

02:54: Be sure to complete the prompted form to include a return address for a safer

02:58: delivery.

02:58: Don't worry, you can update this later if you need to make any changes

03:04: On the right hand side of your screen, you can review the details of your card.

03:06: Always double check that all the information is accurate.

03:09: The Sunday will automatically default to the next business day, but you can change

03:13: it to a later date.

03:14: If you prefer, we can also view cards for individual recipients by clicking on them,

03:18: which is why I placeholders are so beneficial.

03:21: For other previews of the card, select cover or envelope to get a full view of your

03:25: card.

03:28: once you are ready, click approve and send


In this video, I will guide you through the process of creating and sending your first card.

Go to app.inked.com

1. Introduction

To begin, make sure on the main dashboard of ink.com. It should look a little something like this.

Introduction

2. Navigate To "Send a Card"

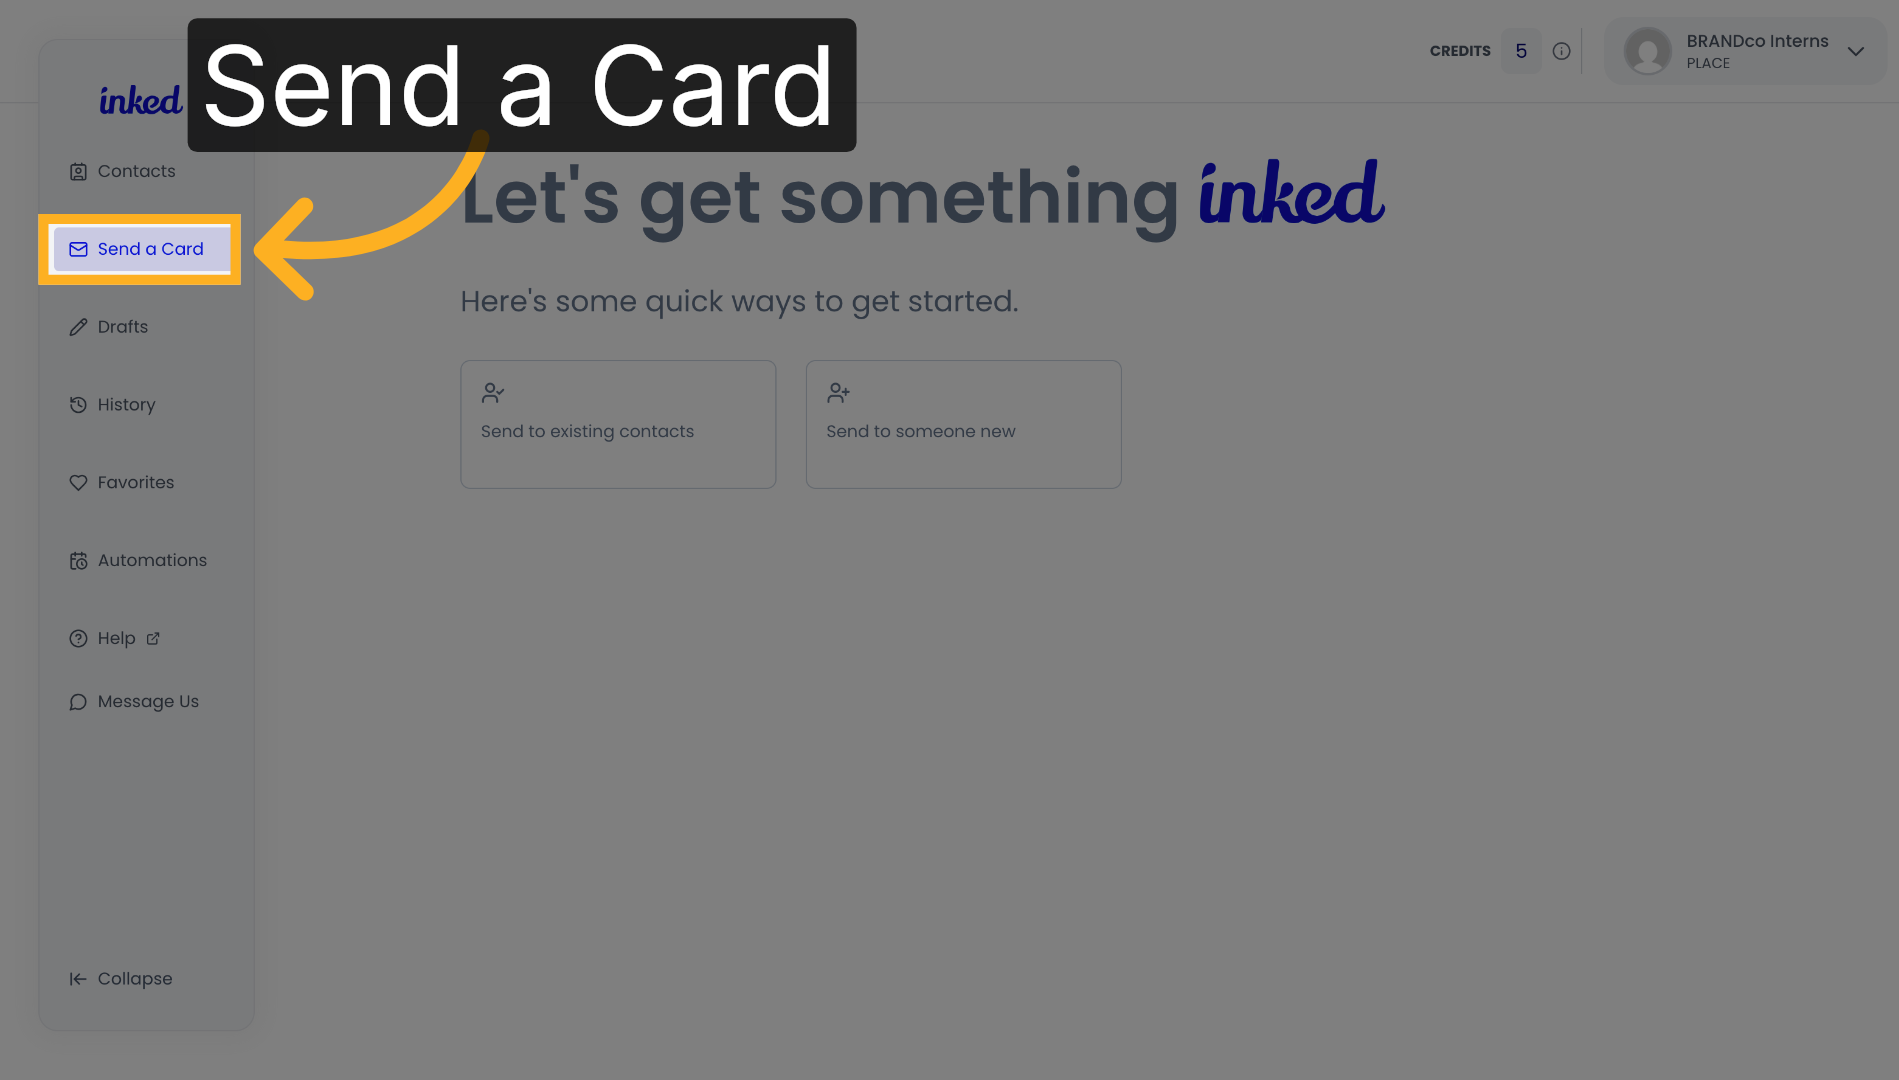
To start, click "Send A Card" on the sidebar on the left of your screen.

Navigate To 'Send a Card'

3. Create New Card from Scratch

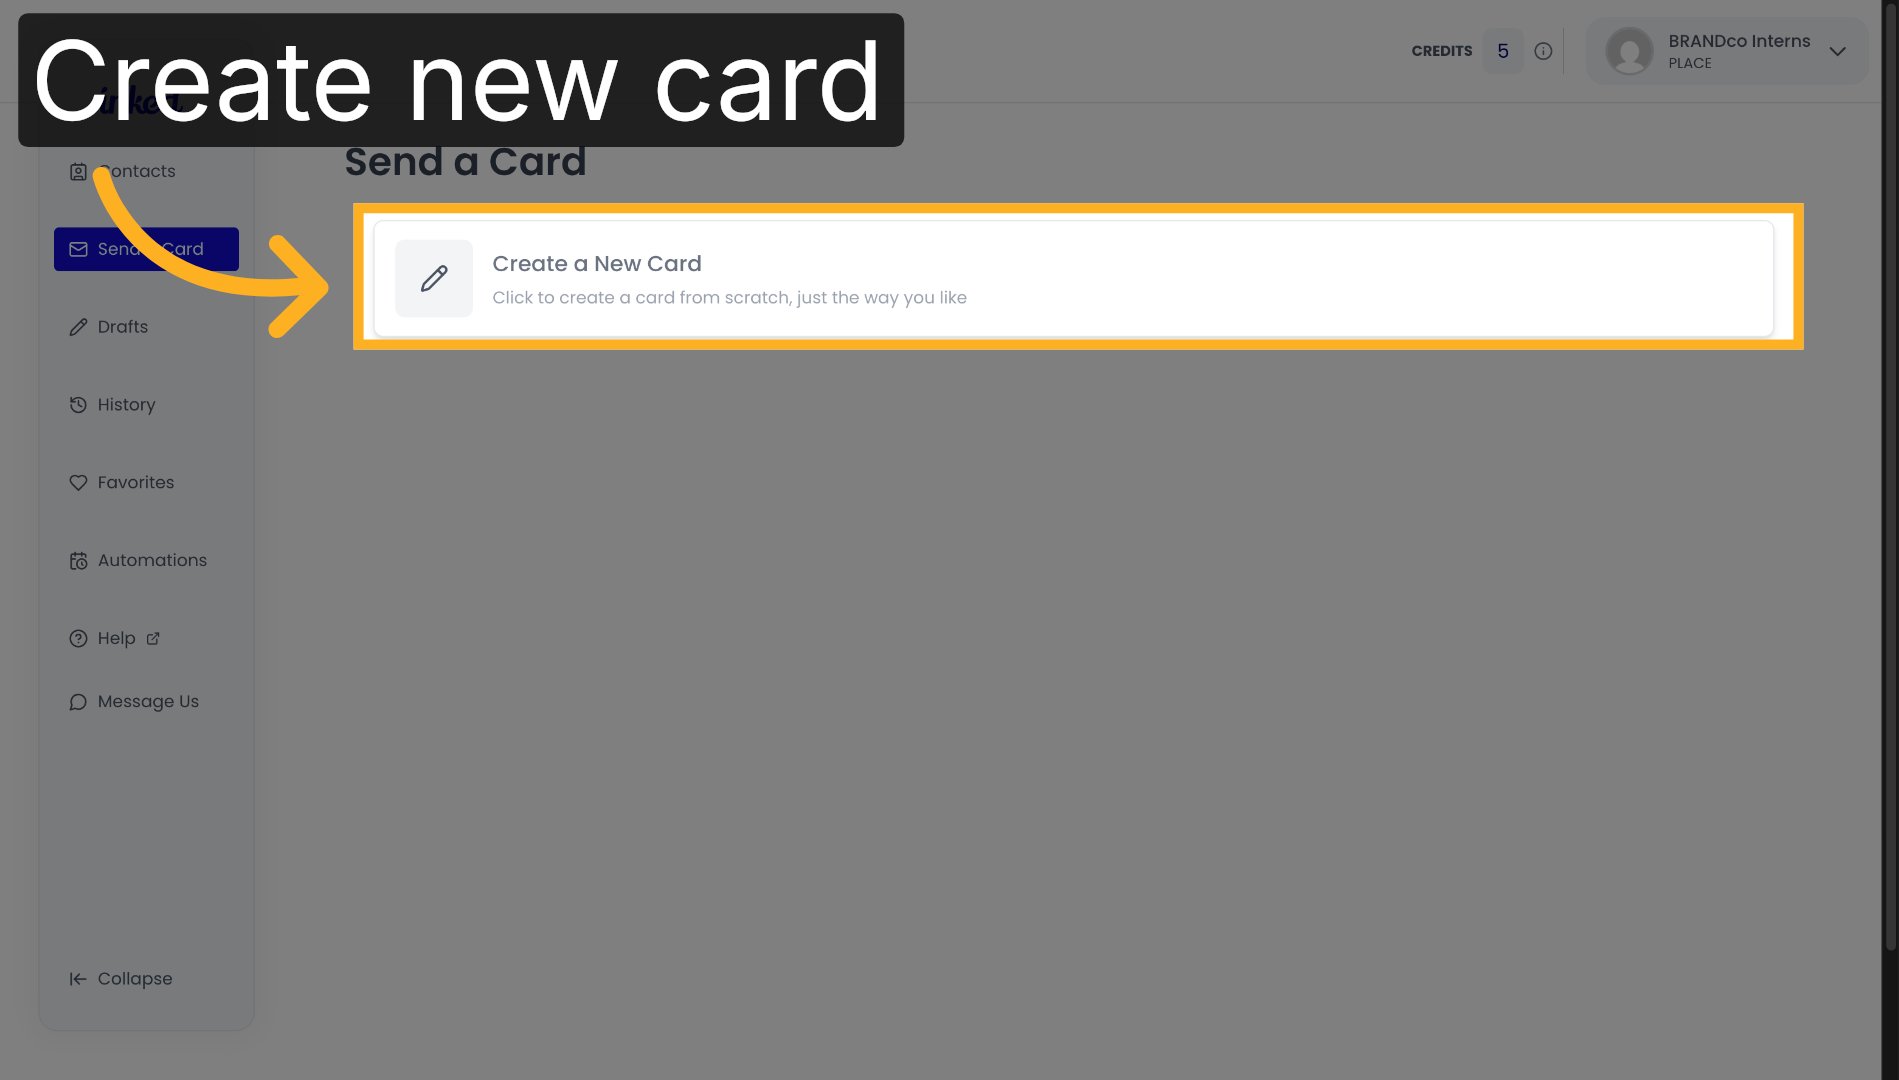
Once you've arrived, click on "Create a New Card" to begin the process.

Create New Card from Scratch

4. Choose Card Cover

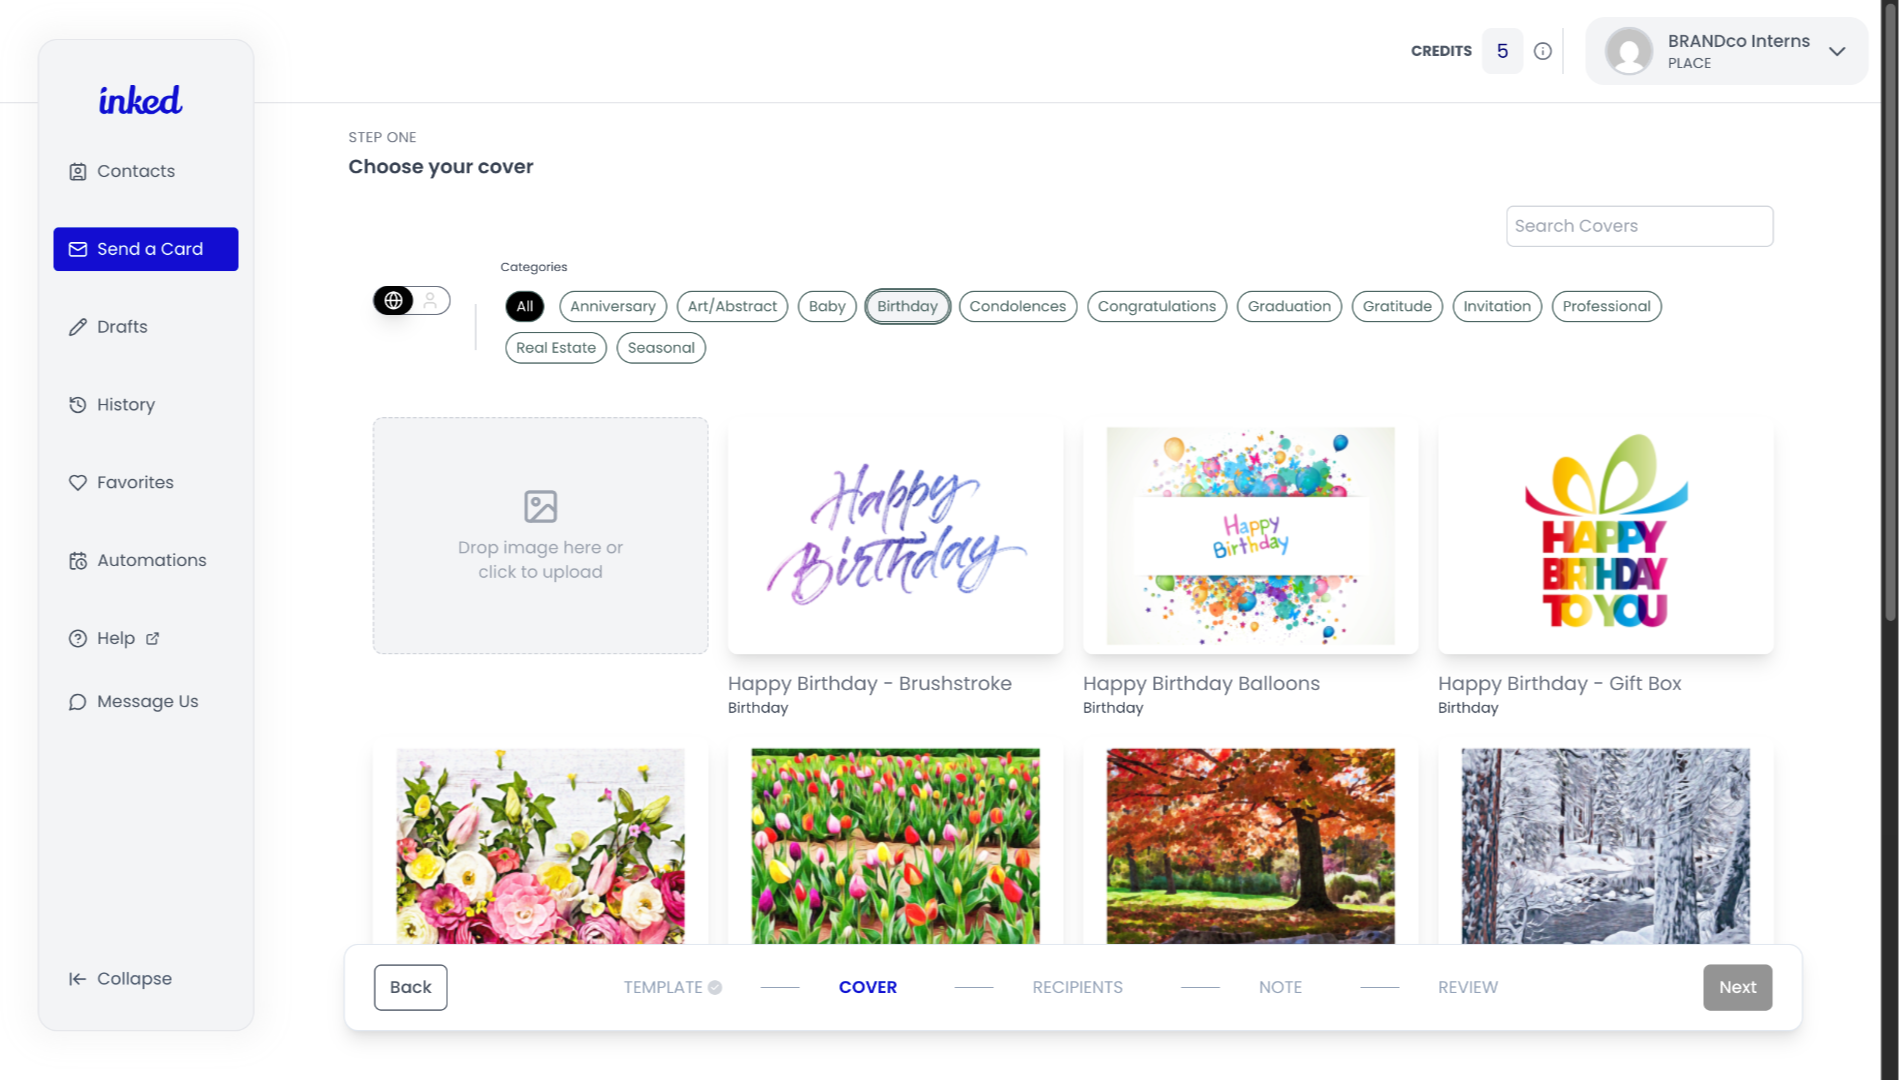
You can upload your own image or choose from one of our shared covers.

Choose Card Cover

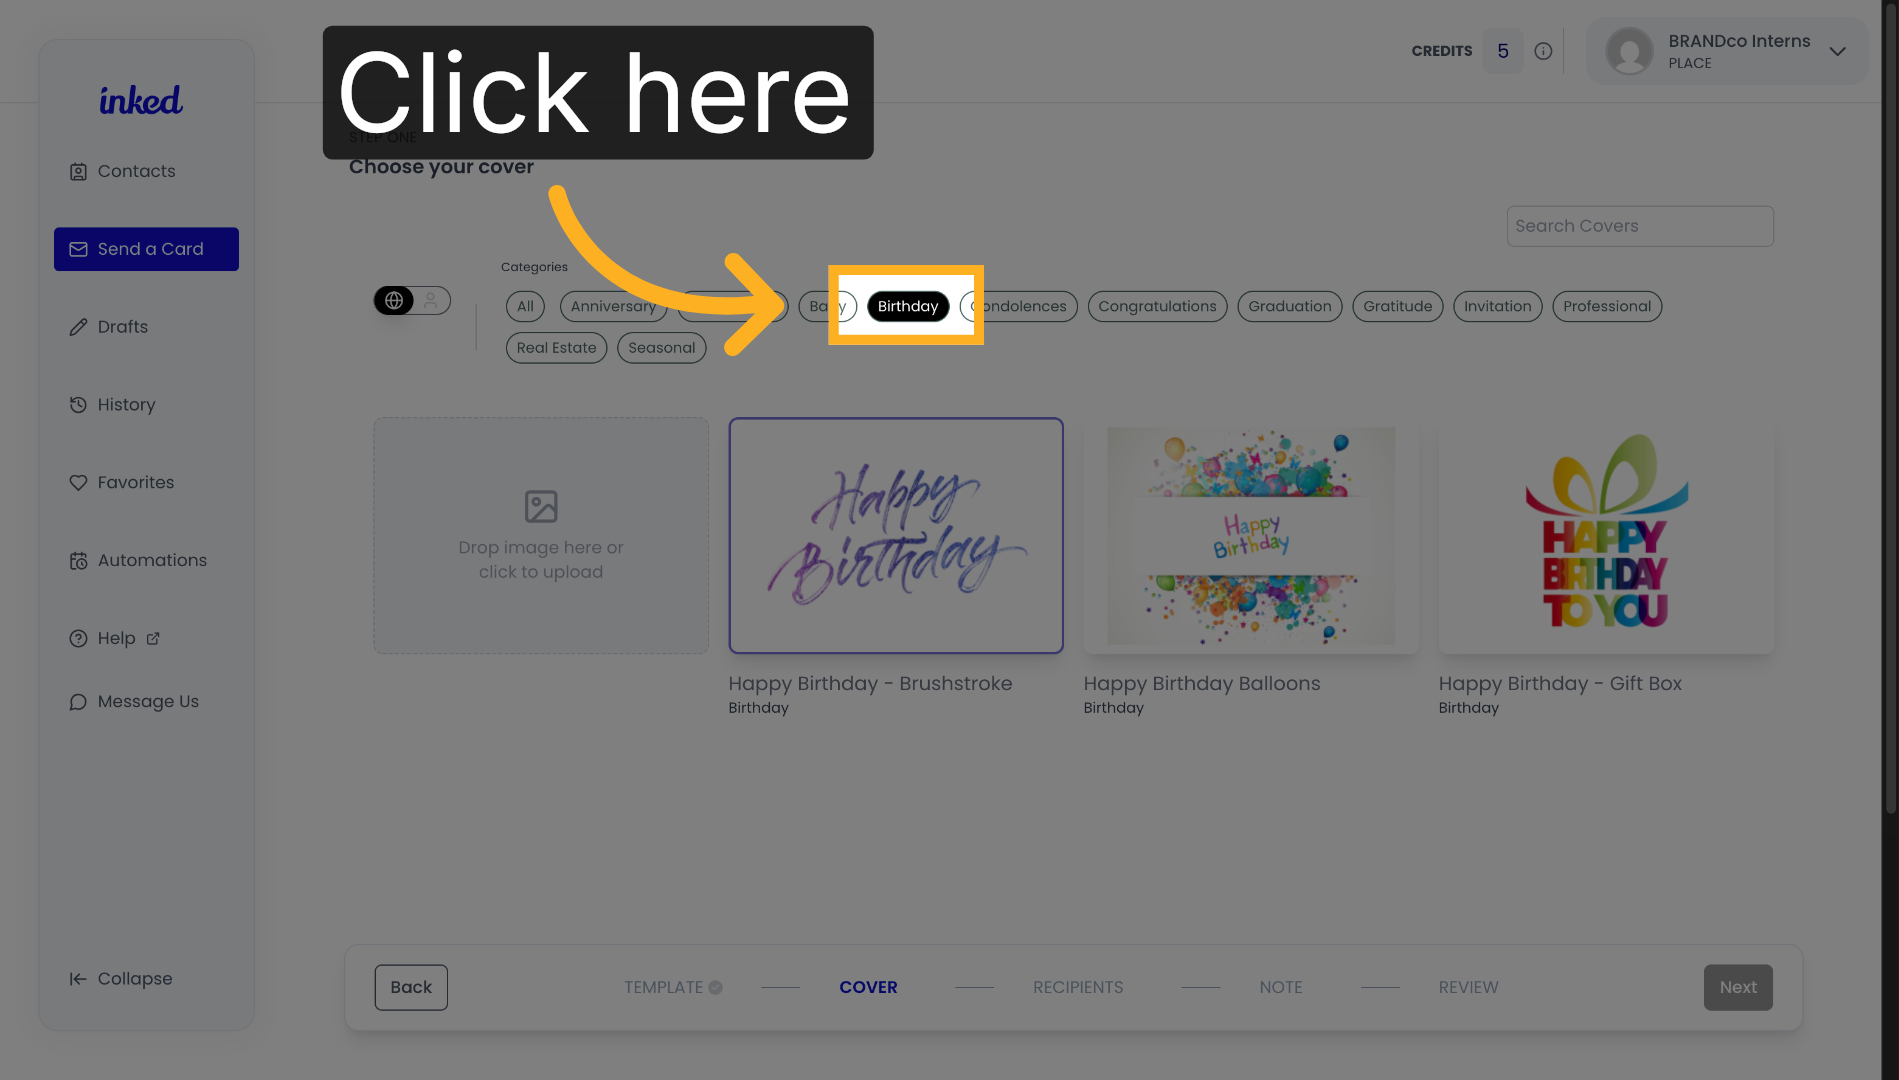
5. Card Cover Categories

If you are looking for a specific type of cover, you can filter them by selecting a category from the top bar.

Card Cover Categories

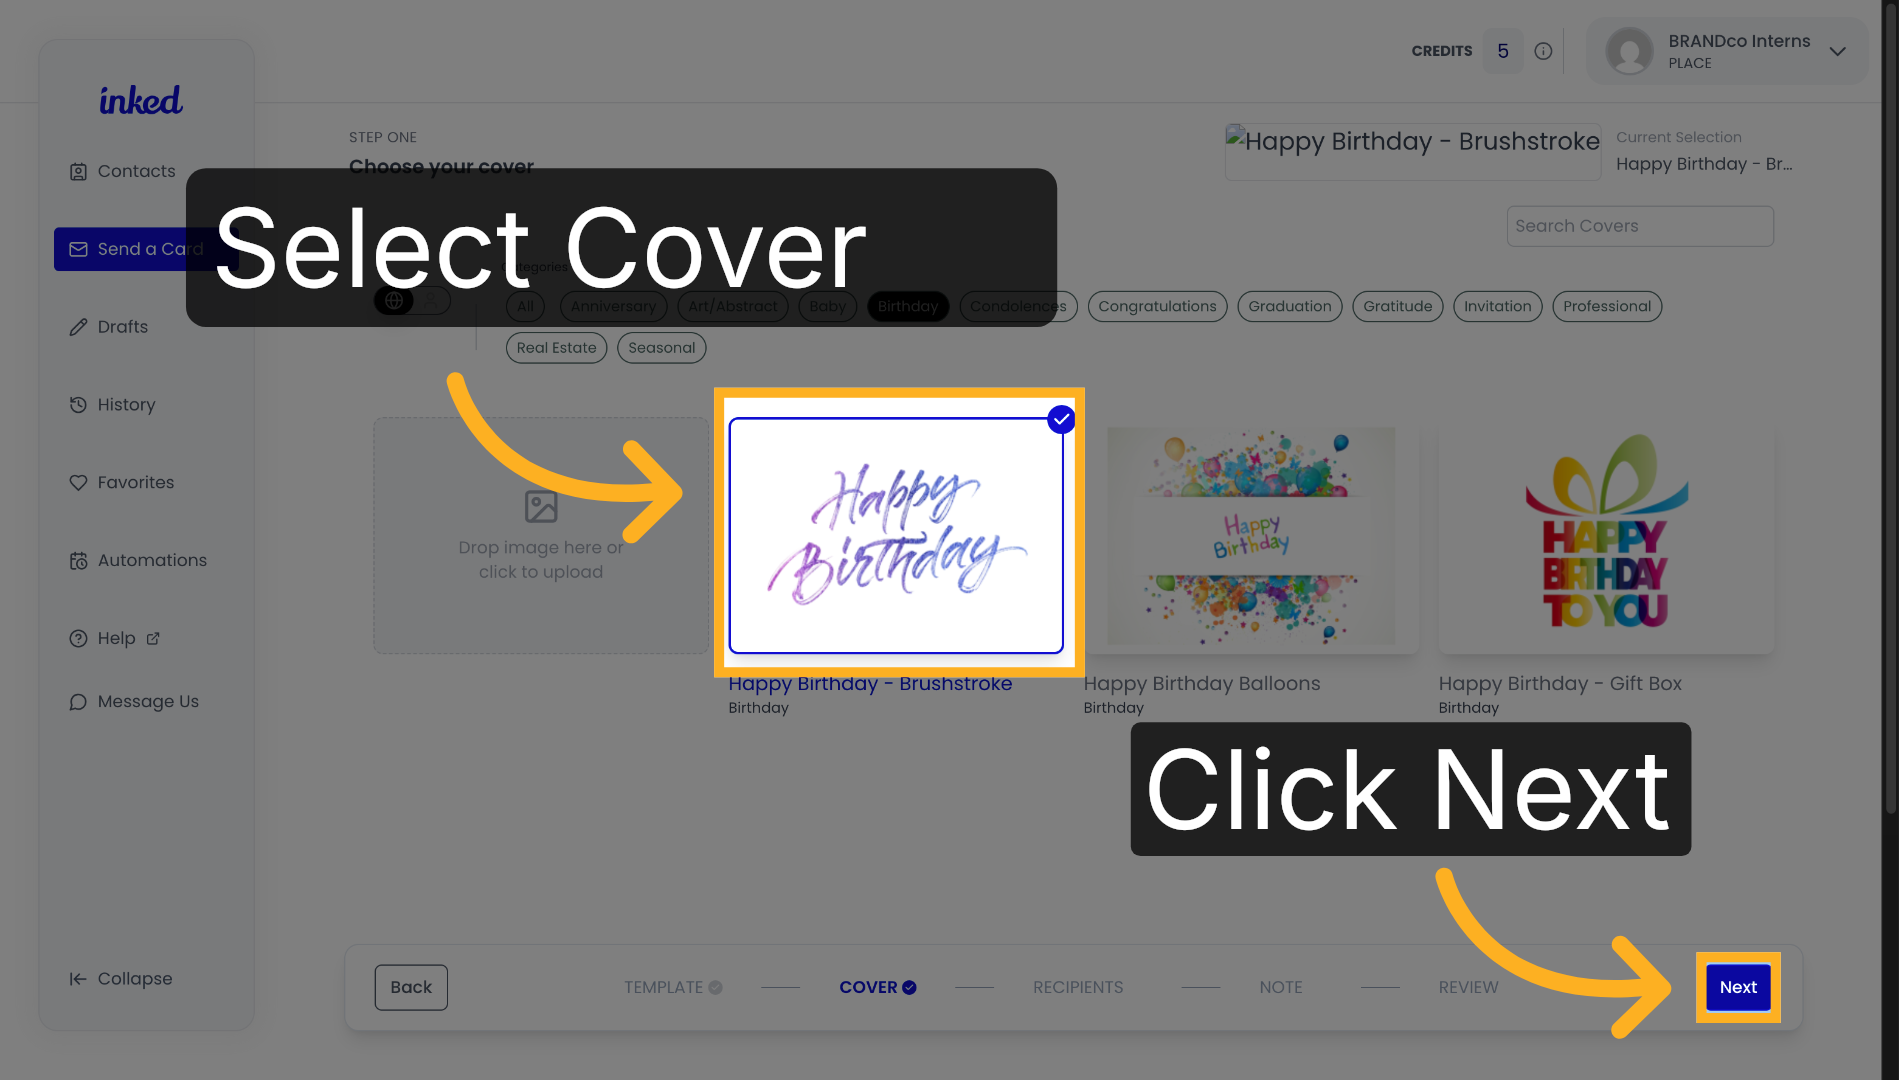
6. Proceed to Next Step: Recipients

Once you selected your preferred card cover, click "Next" on the bottom right.

Proceed to Next Step: Recipients

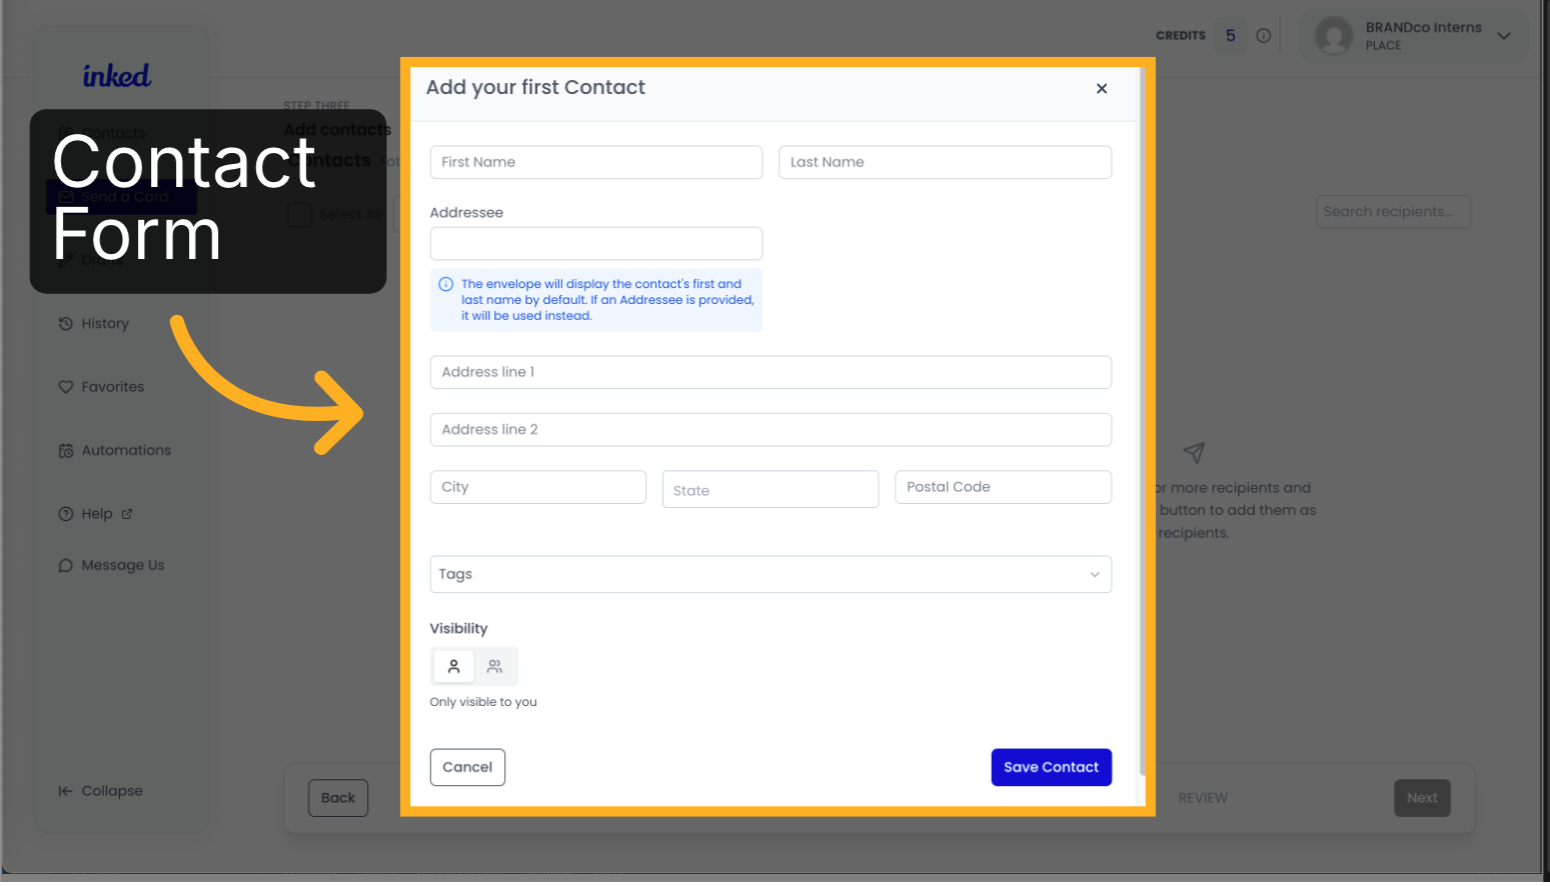
7. Create Your First Contact

It's time to add your first contact! Begin filling out the following form with information about your card recipient.
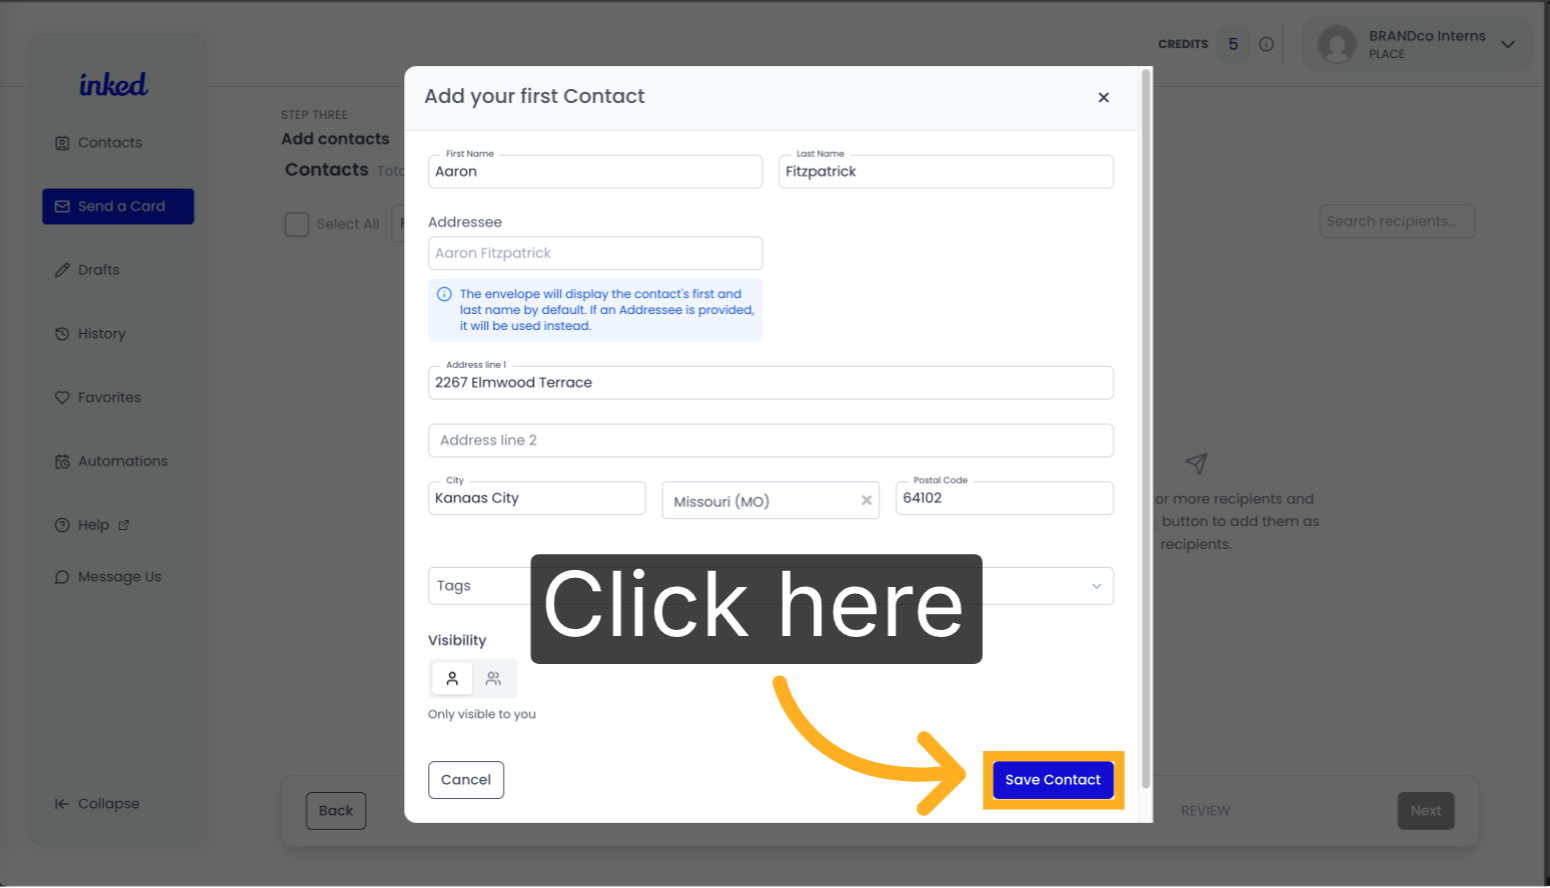
Create Your First Contact

8. Save New Contact

Once you have completed the form with the correct information, press "Save" on the bottom right corner of the form and your new contact will be on your recipient list.
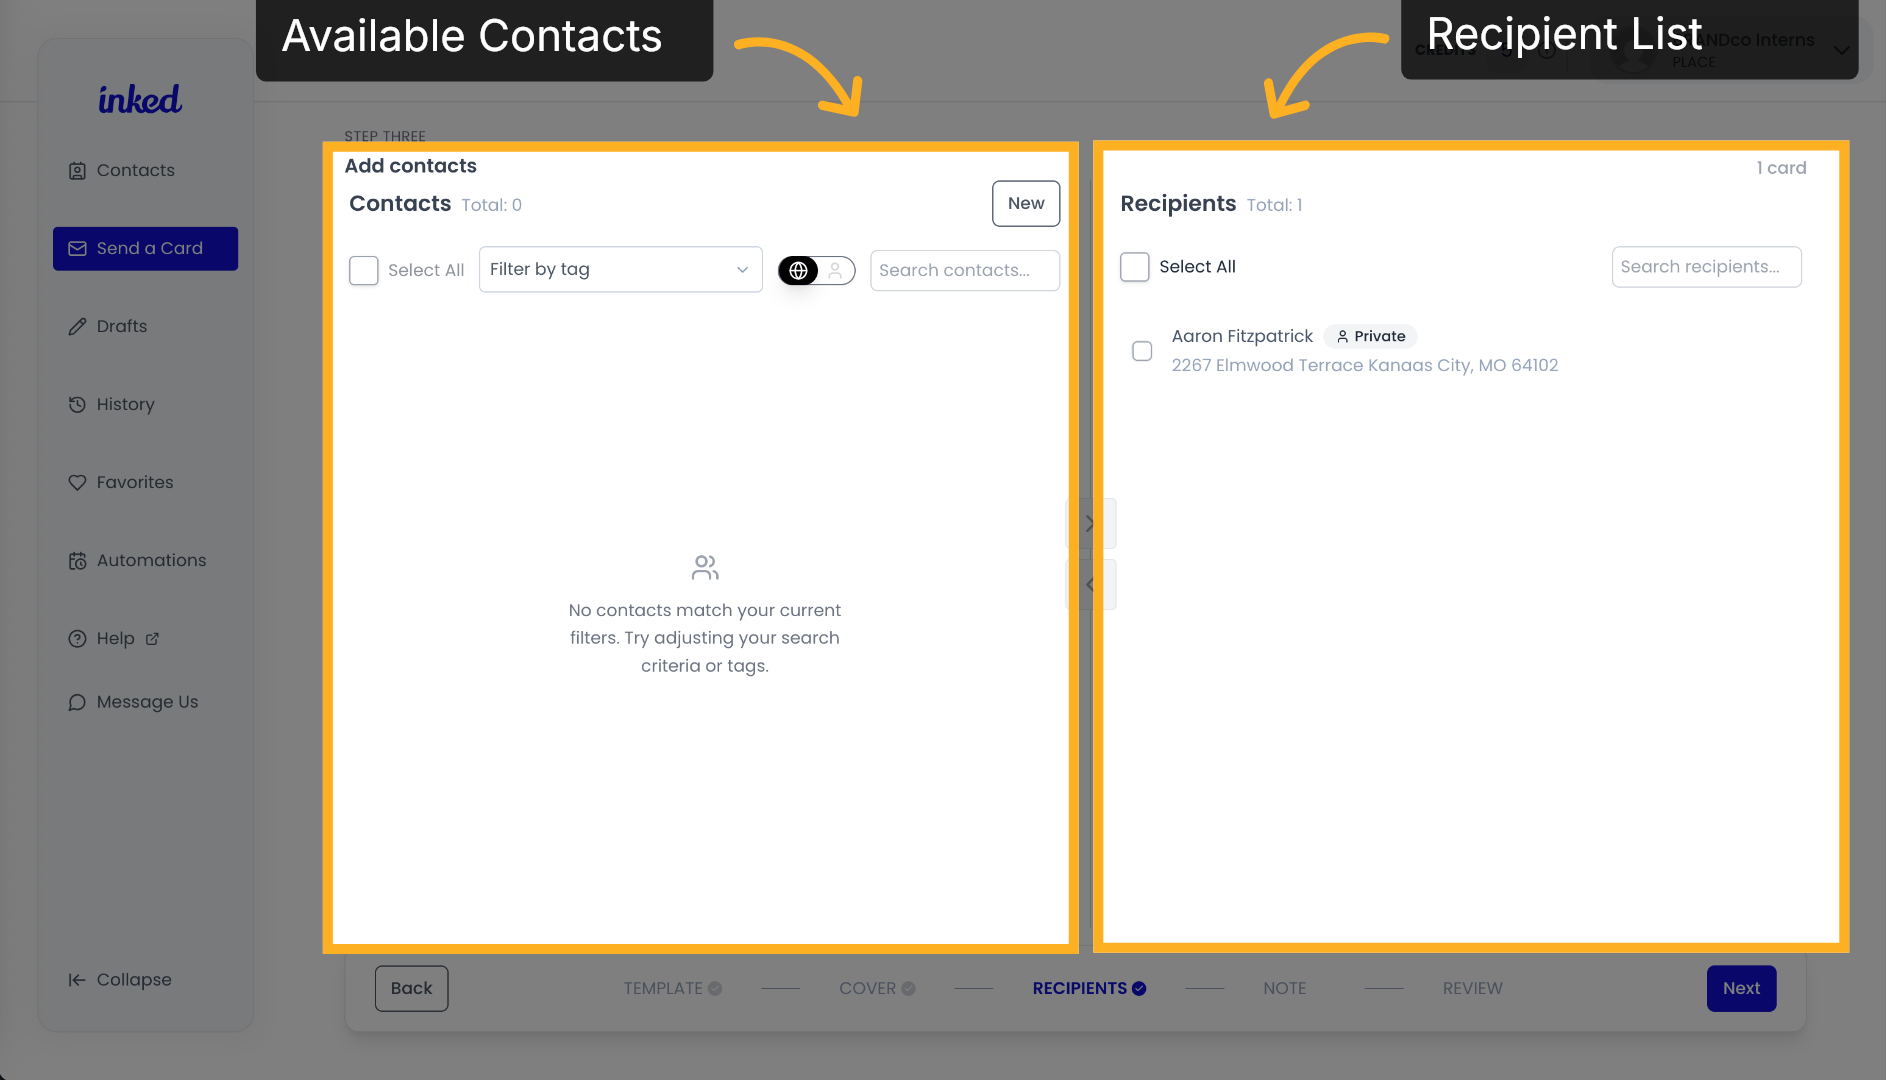
Save New Contact

9. Recipient List

Your available contacts are listed on the left, since this is your first time, it will be empty. As you add contacts they'll appear here, and you can add or remove them from your recipient list on the right.

Recipient List

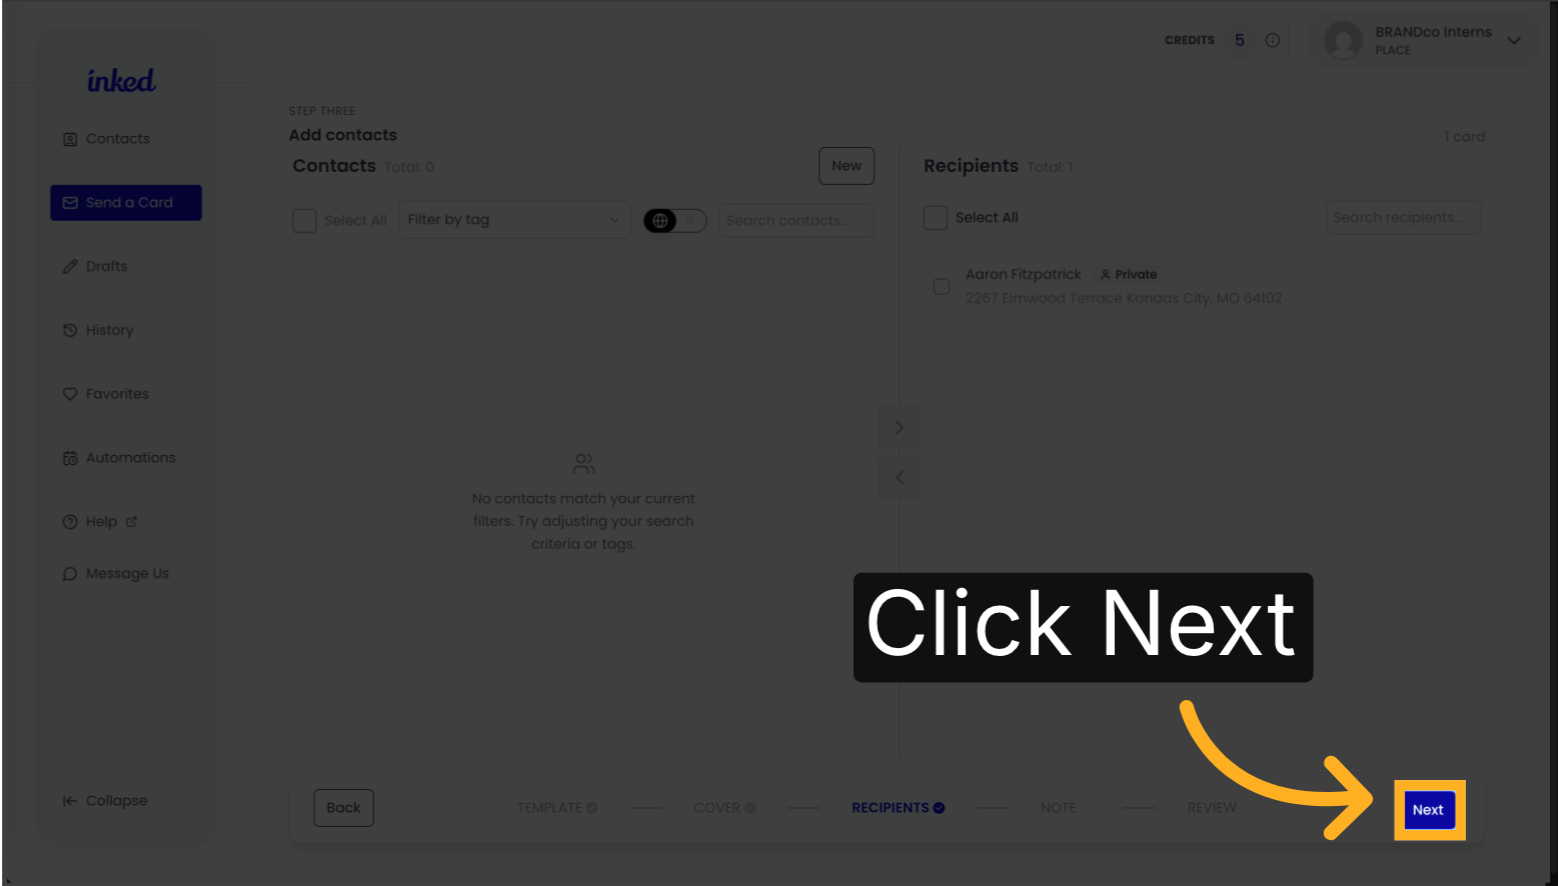
10. Proceed To Next Step: Note

Once you've added all the recipients you would like to send this card to, click "Next" to continue.

Proceed To Next Step: Note

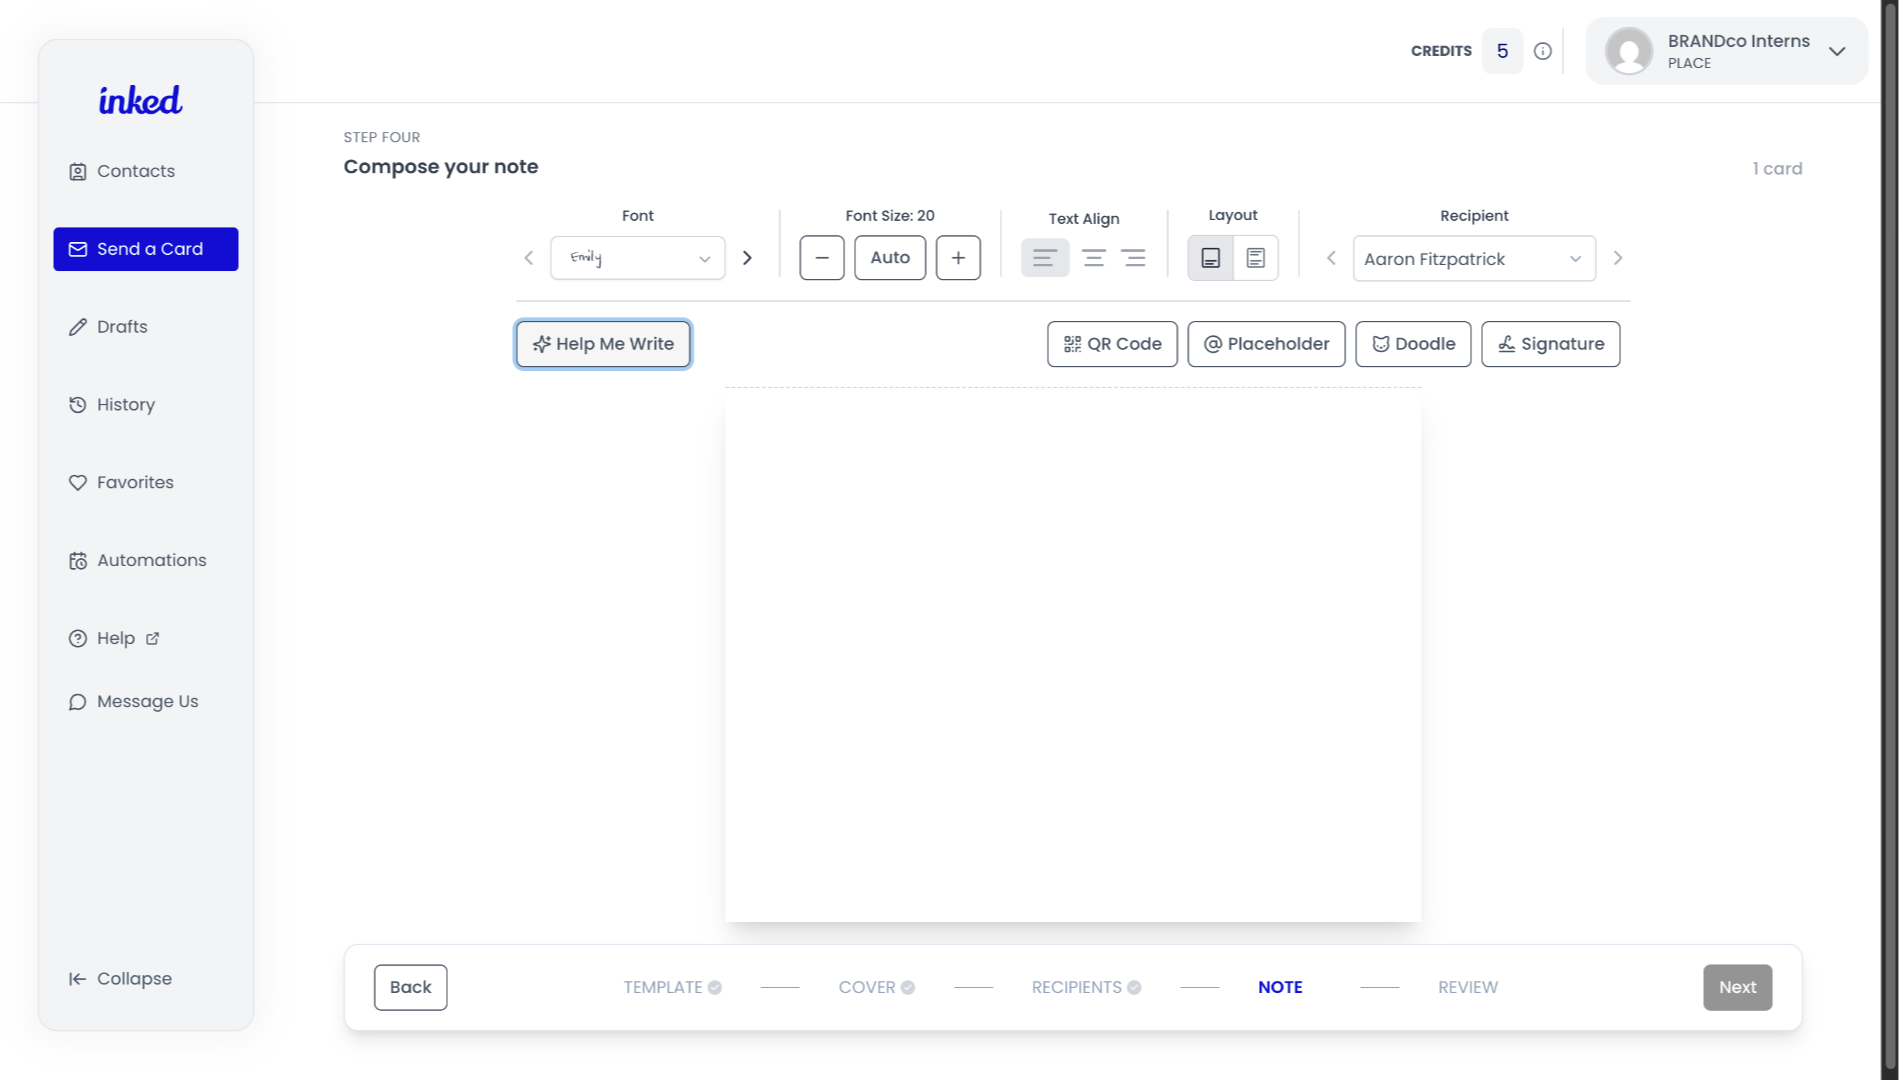
11. Writing Your Card

Now it's time to personalize your card! Click on the card to begin writing your message. Feel free to explore all of our features to make it your own!

Learn more: Signatures | Placeholders

Writing Your Card

12. Proceed to Next Step: Review

Once you have finished with your card, click "Next" to begin the final review before sending it off.

Proceed to Next Step: Review

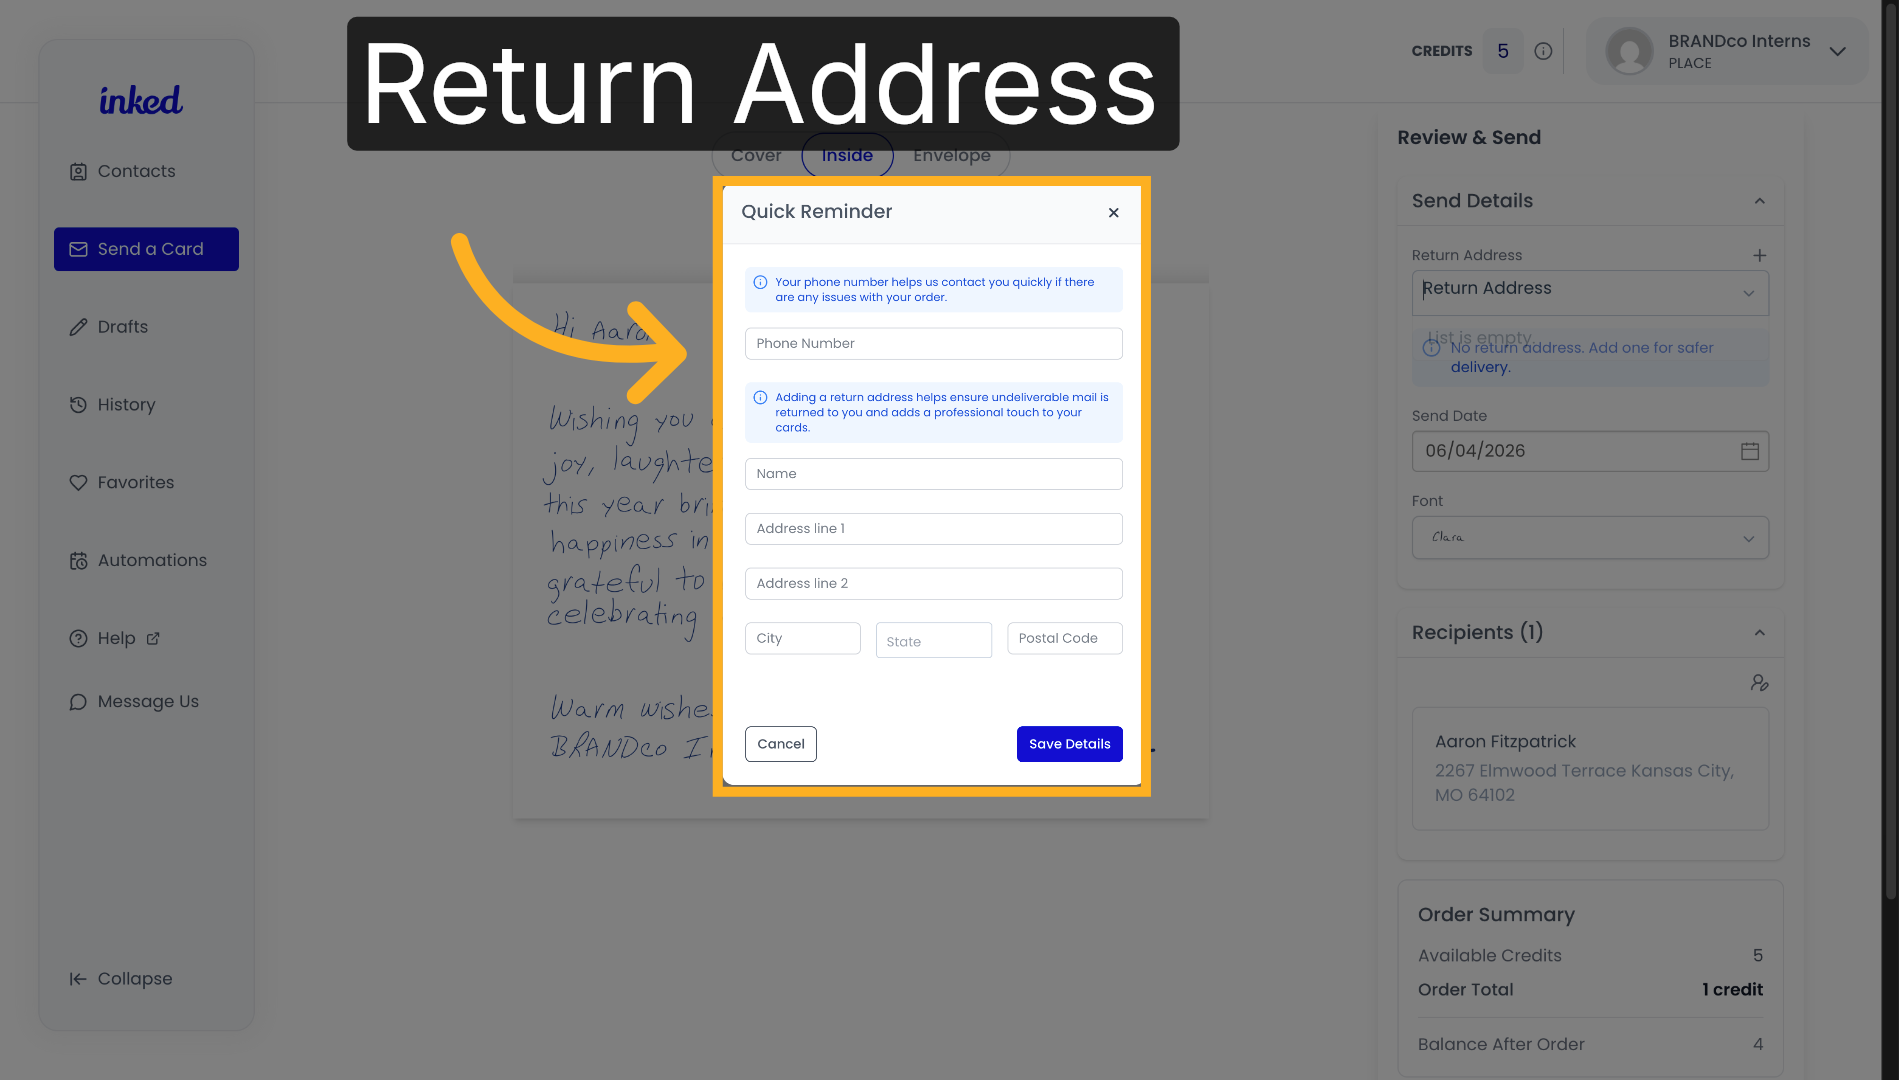
13. Adding A Return Address

Be sure to complete the prompted form to include a return address for a safer delivery. Don't worry, you can update this later if you need to make any changes. Learn more

Adding A Return Address

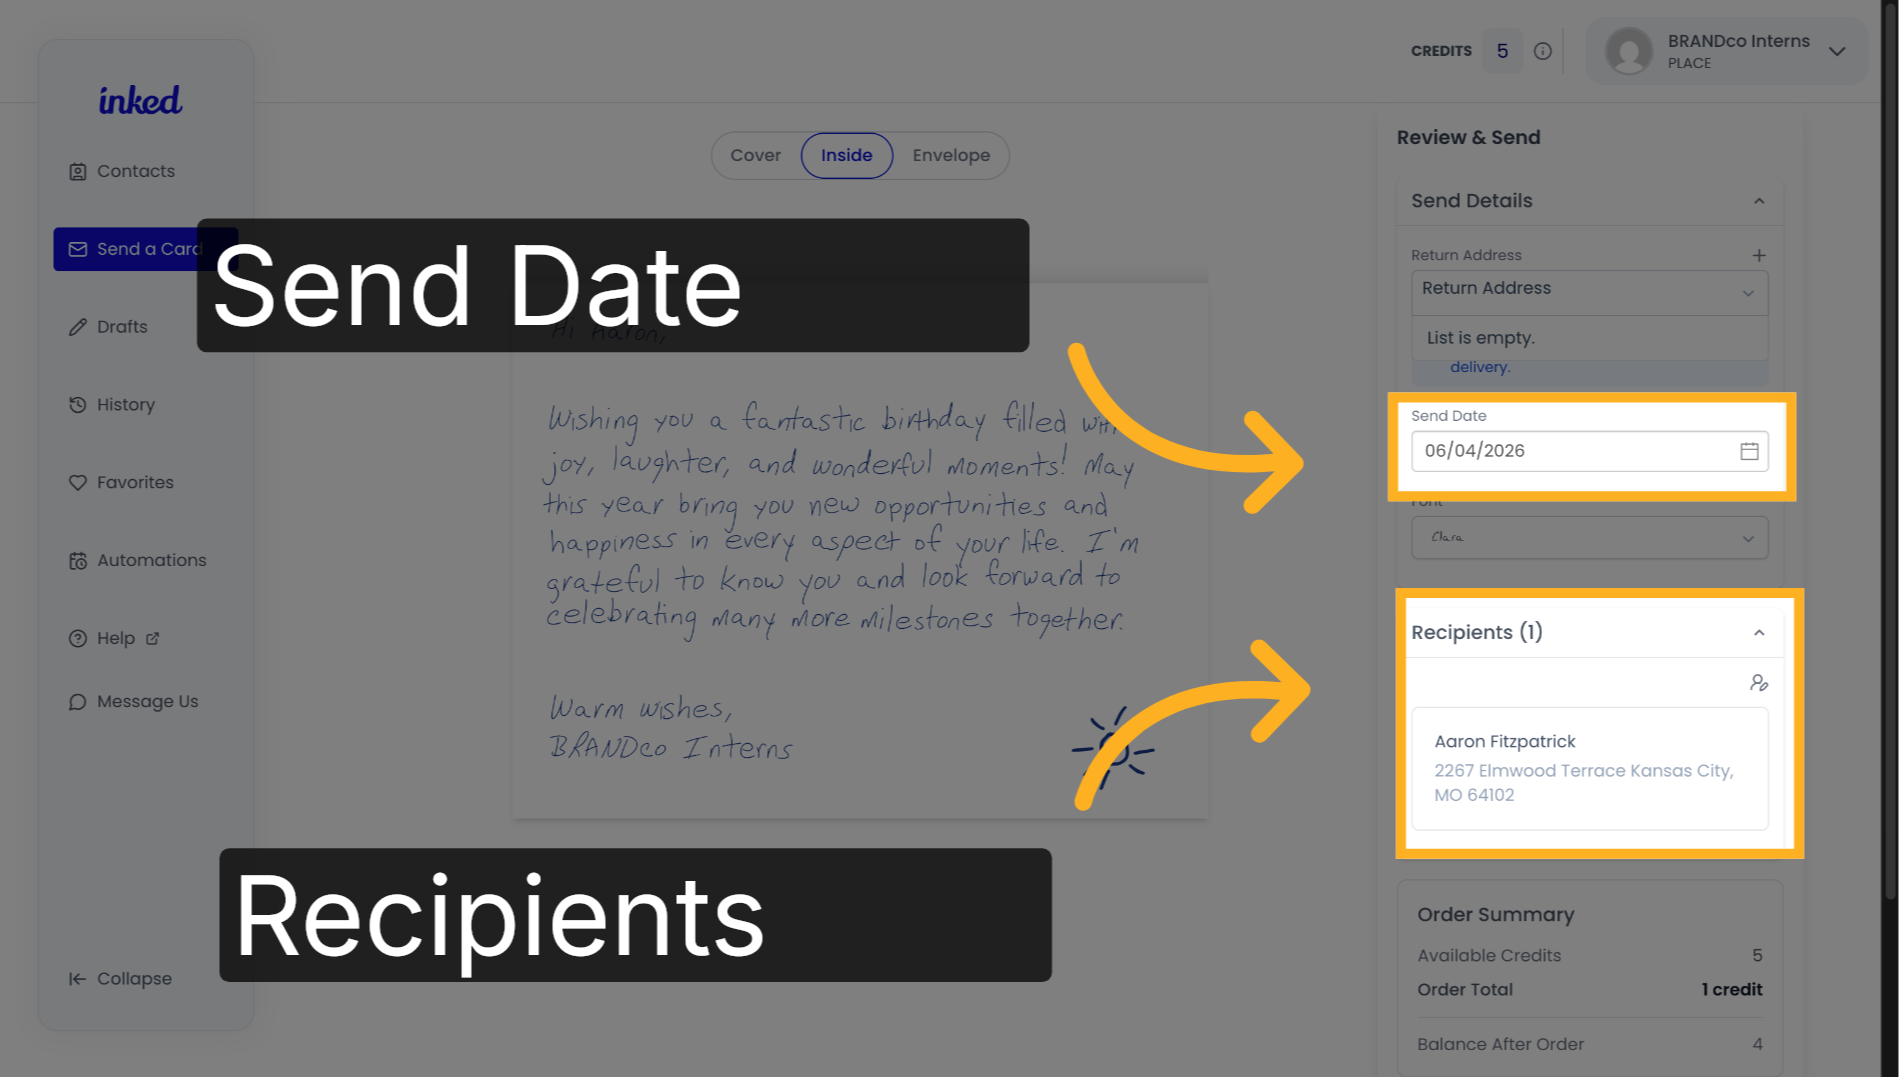
14. Final Card Details

On the right hand side of your screen, you can review the details of your card. Always double check that all the information is correct.

The Send Date will automatically default to the next business day, but you can change it to a later date if you prefer. Learn more

View cards for individual recipients by clicking on them, which emphasizes the advantages of using Placeholders. Learn more

Final Card Details

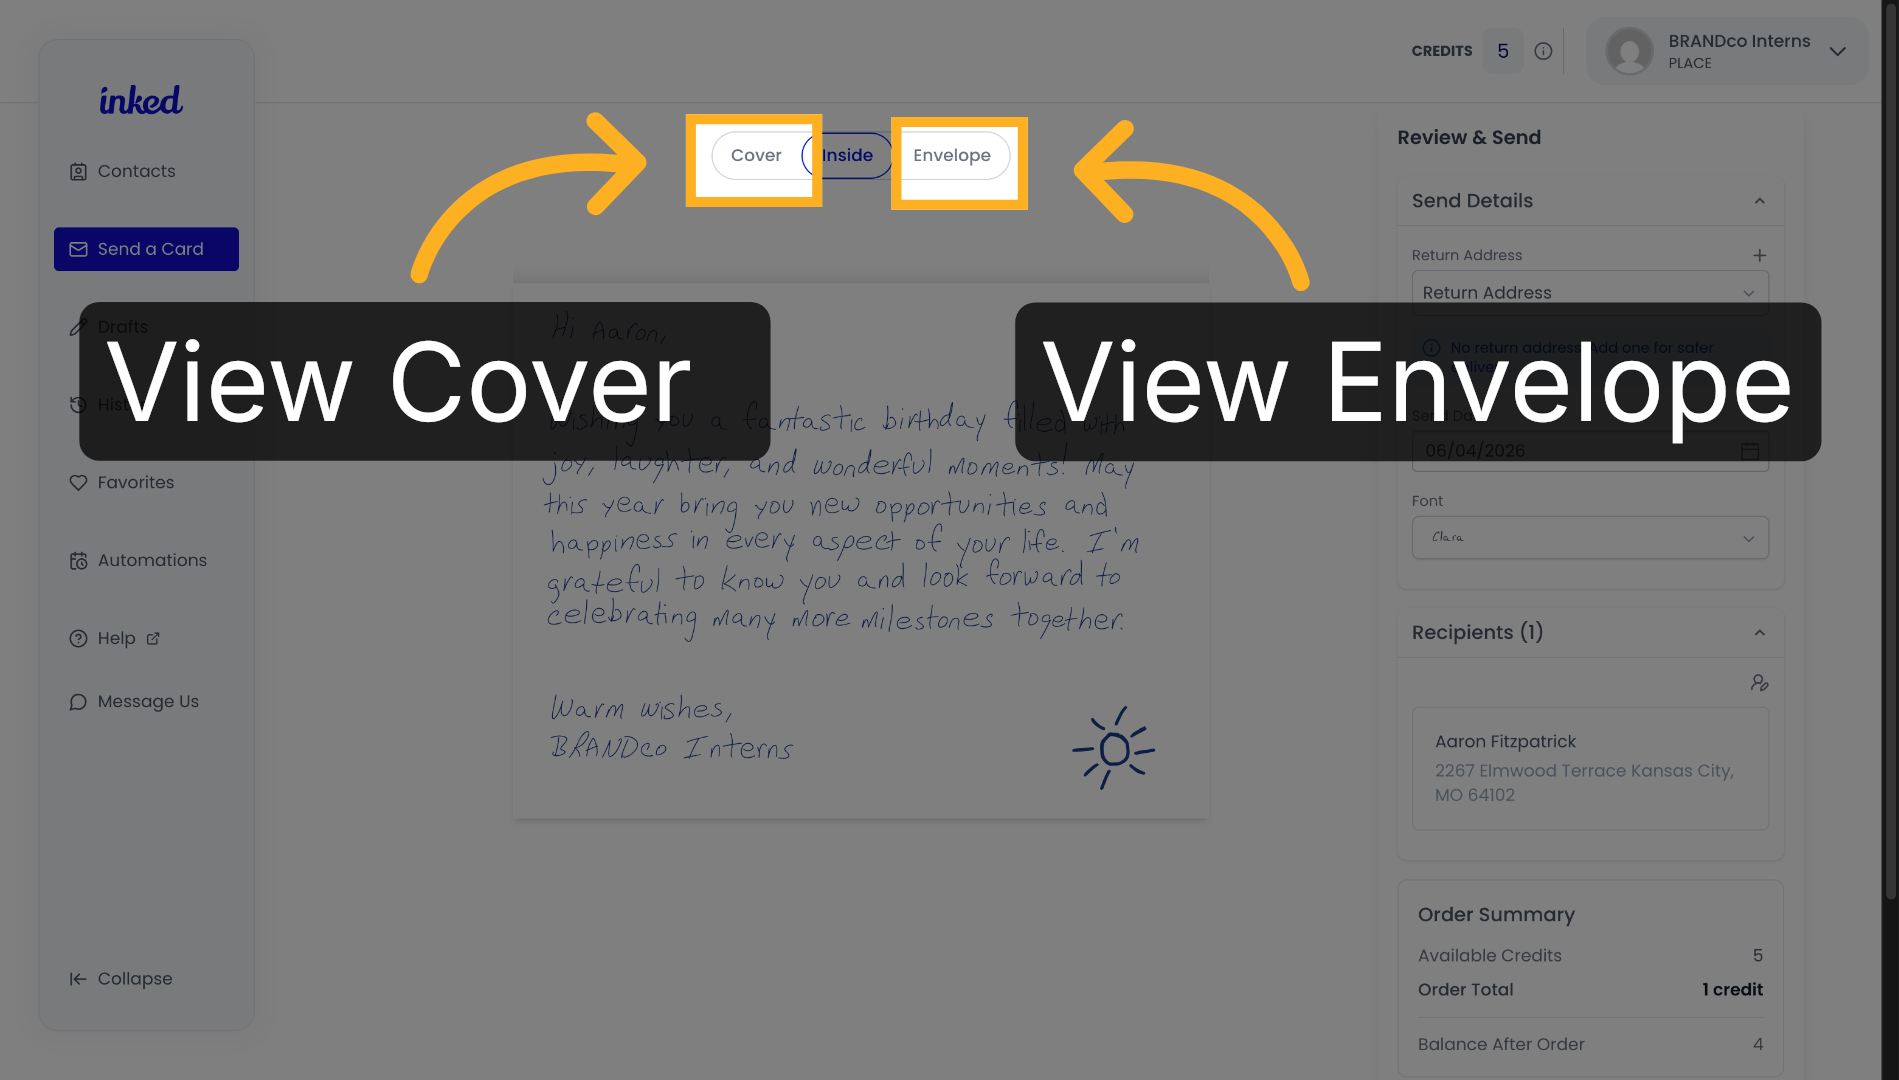
15. View Card Cover & Envelope

For other previews of the card, select "Cover" or "Envelope" to get a full preview of your card.

View Card Cover & Envelope

16. Approve and Send Card

When you're ready, click "Approve and Send".

Approve and Send Card

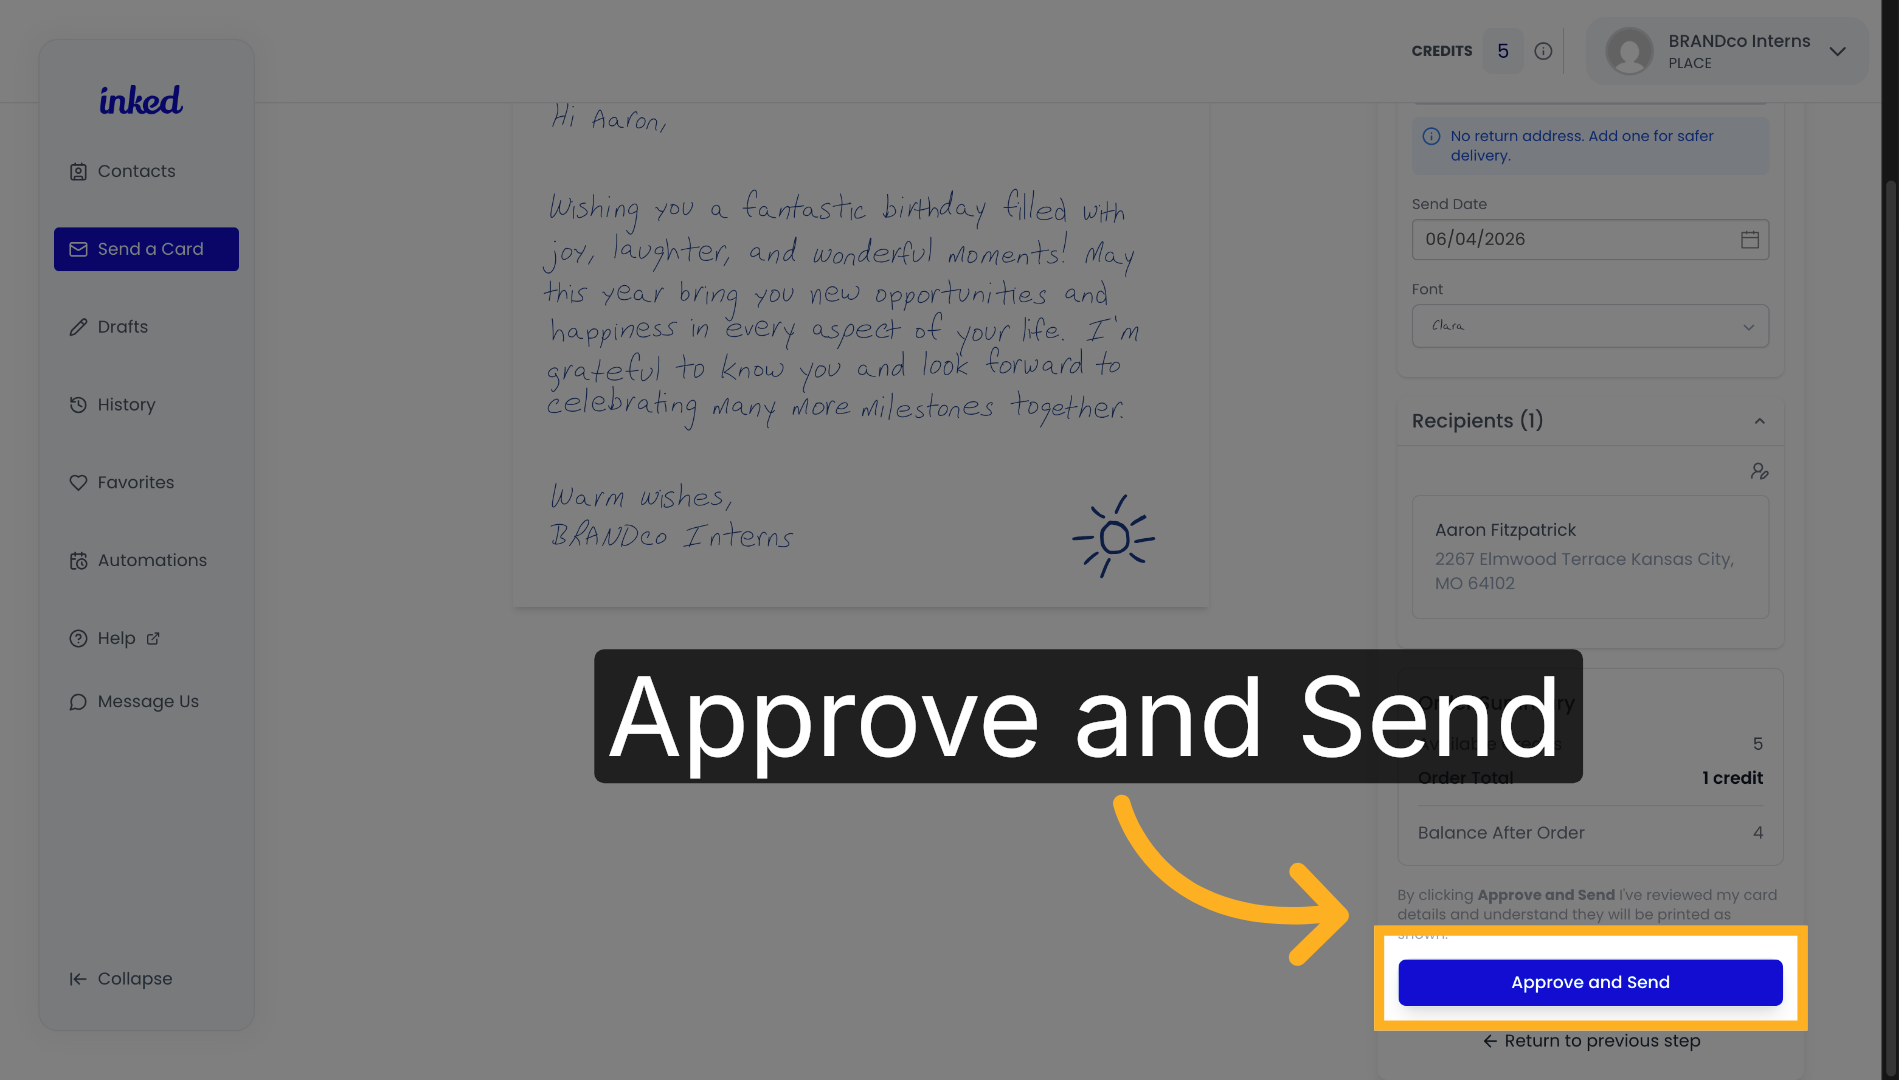
Congratulations! You have created and sent your first card!


Inked Logo

Address

7100 TPC DR STE 700
ORLANDO, FL 32822

Contact

407-499-3000

hello@inked.com

More Info

Privacy Policy

Terms of Service

© BRANDco., LLC 2025. All Rights Reserved Worldwide