How Do I Import a List of Contacts?
Importing contacts into Inked is quick and easy. Let me show you how to do this in five simple steps.
Go to app.inked.com
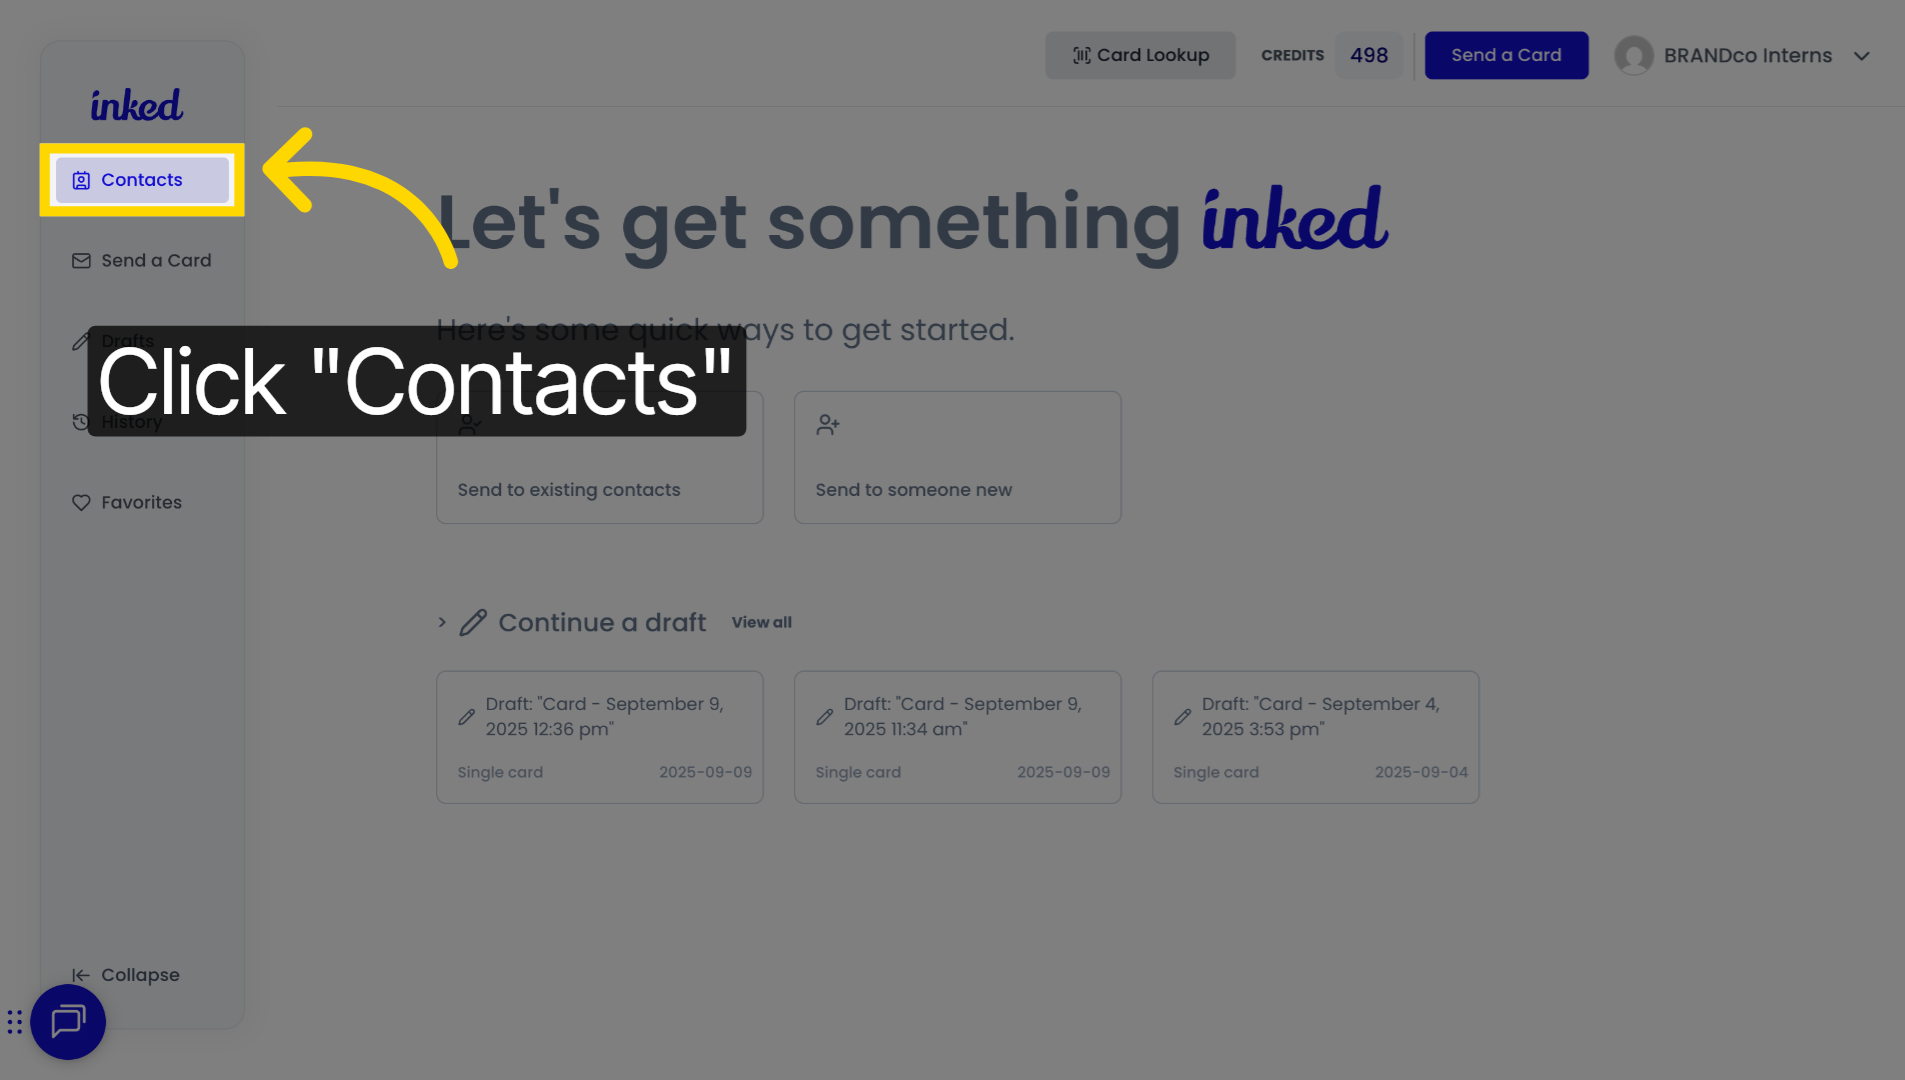
1. Click "Contacts"
From your ink dashboard. Click on the contacts, tab in the navigation bar, this is where you'll manage your entire contact list.
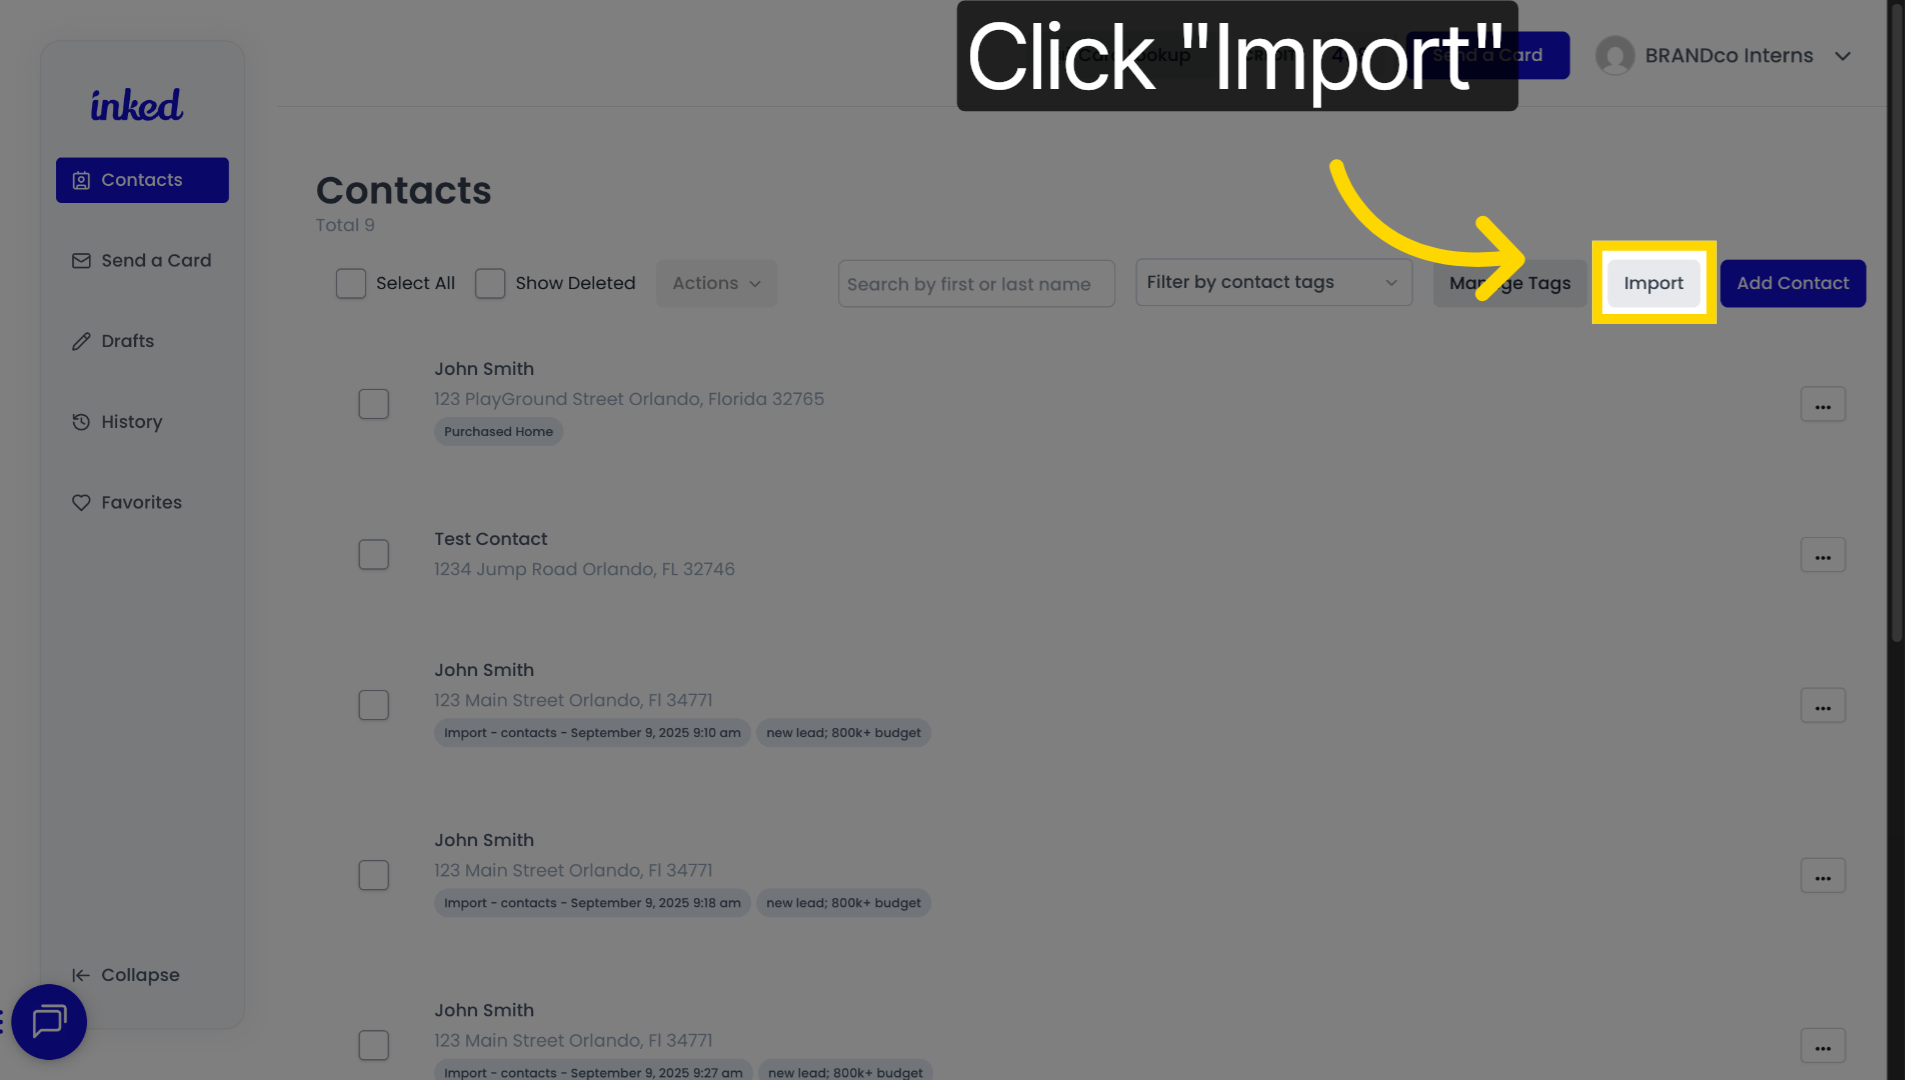
2. Click "Import"
Inside the context, tab, click the import button to open the import interface.
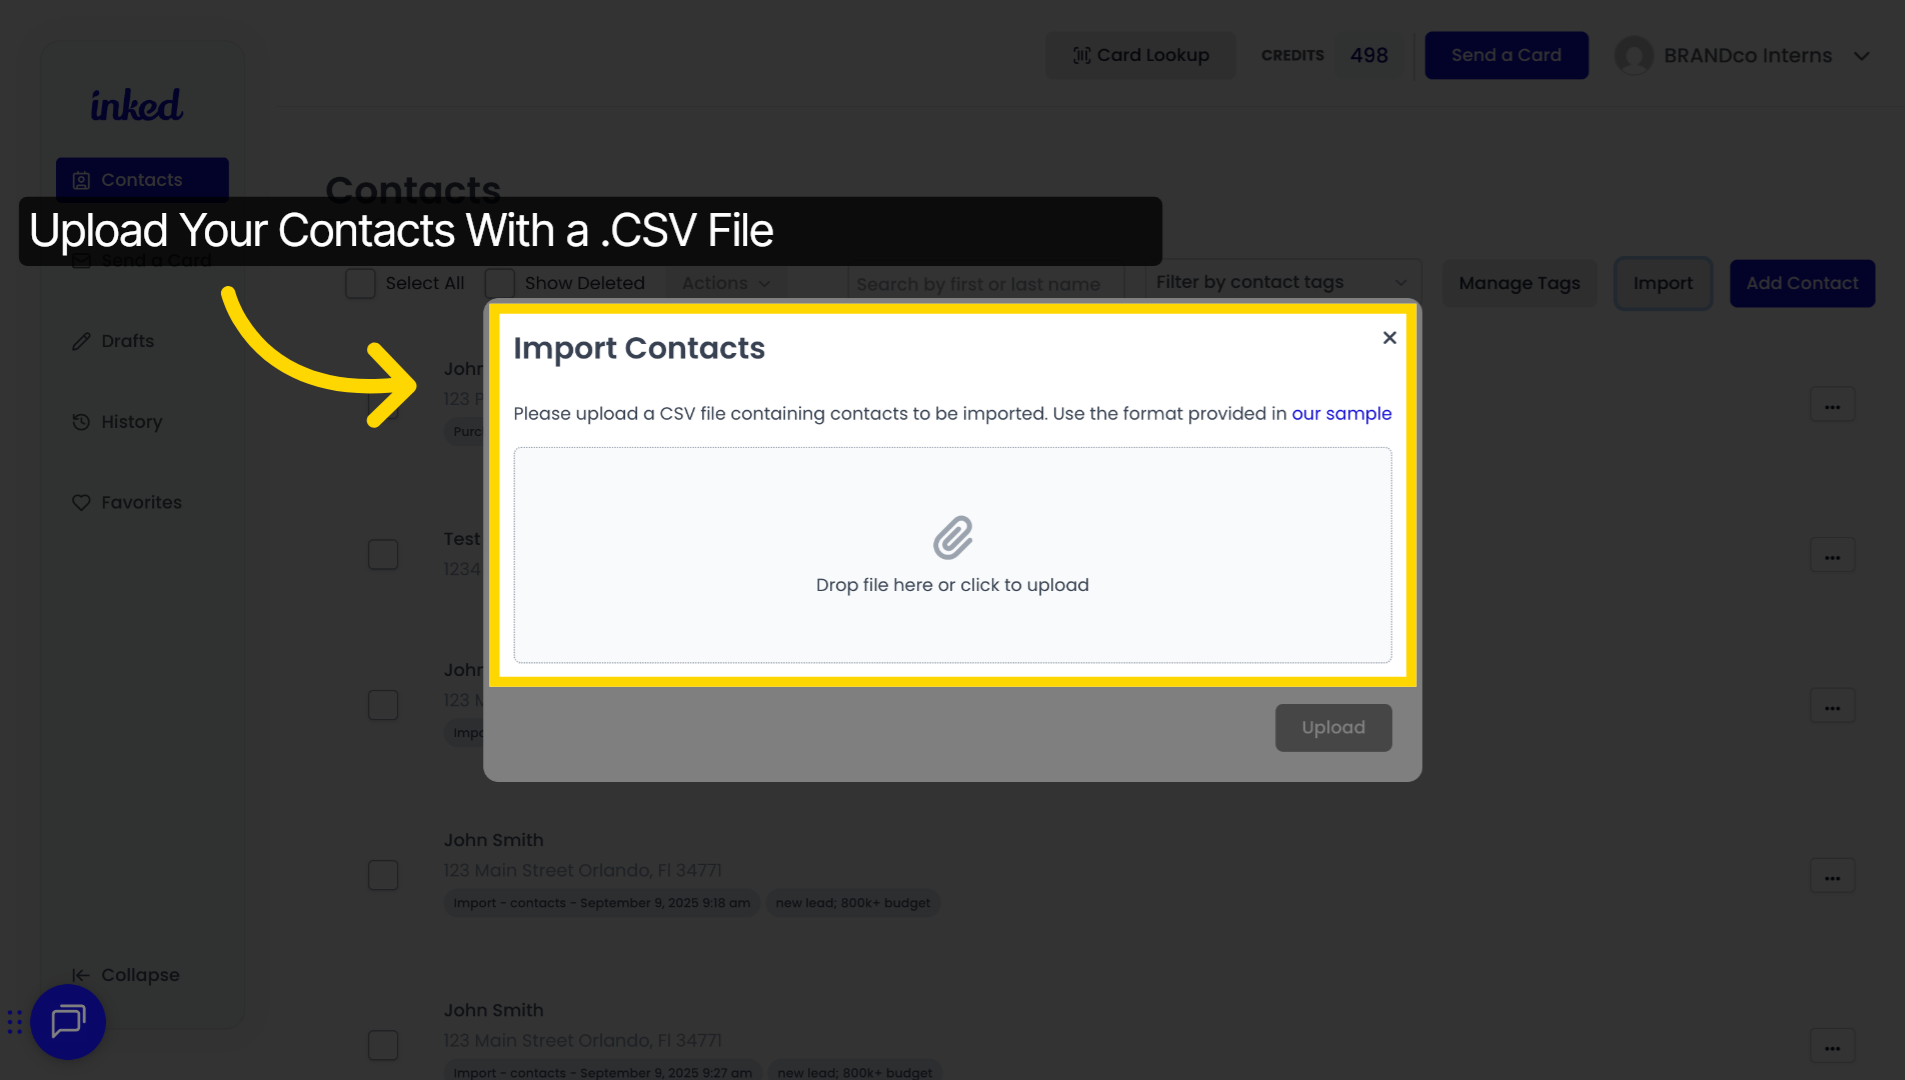
3. Import Your Contacts
From there, you'll be able to upload your file for import Ink'd accept CSV files only. So make sure your list is saved in that format. If you're not sure how to set it up, you can download our sample CSV file as a template.
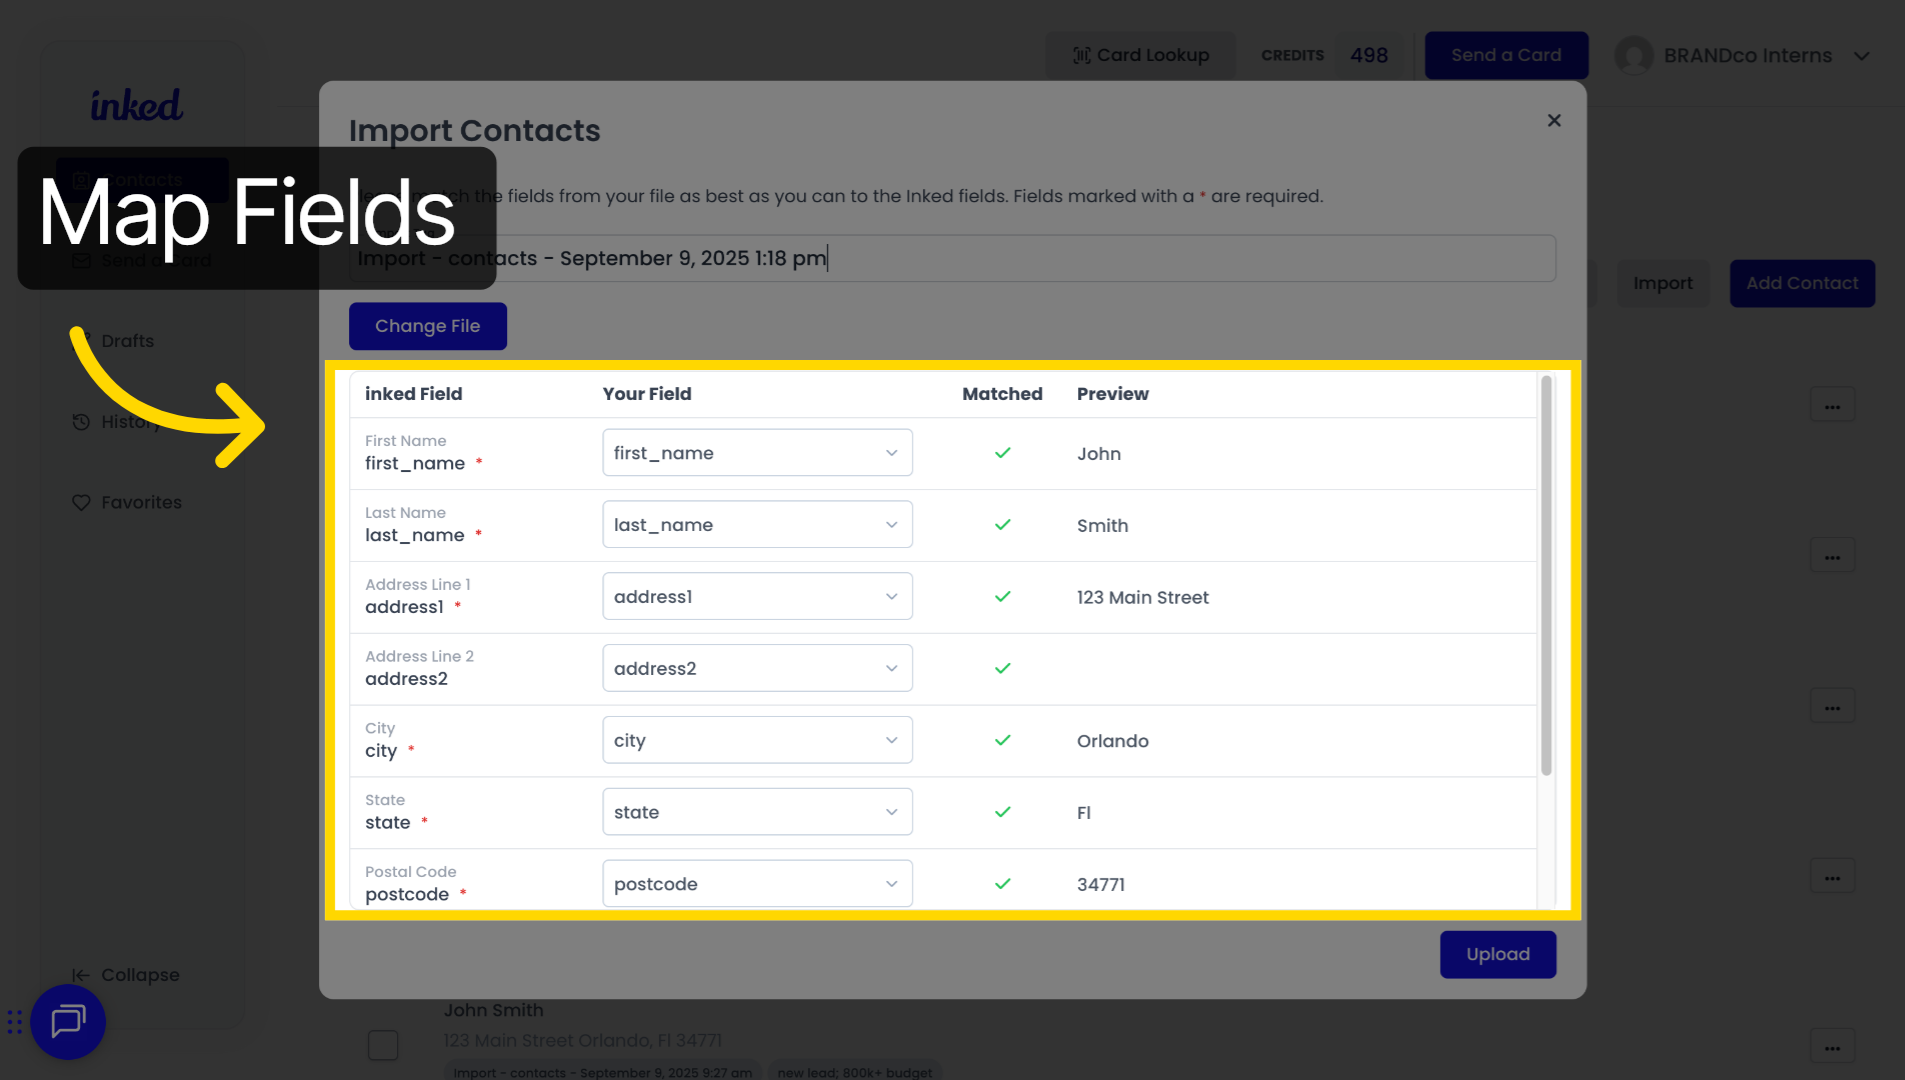
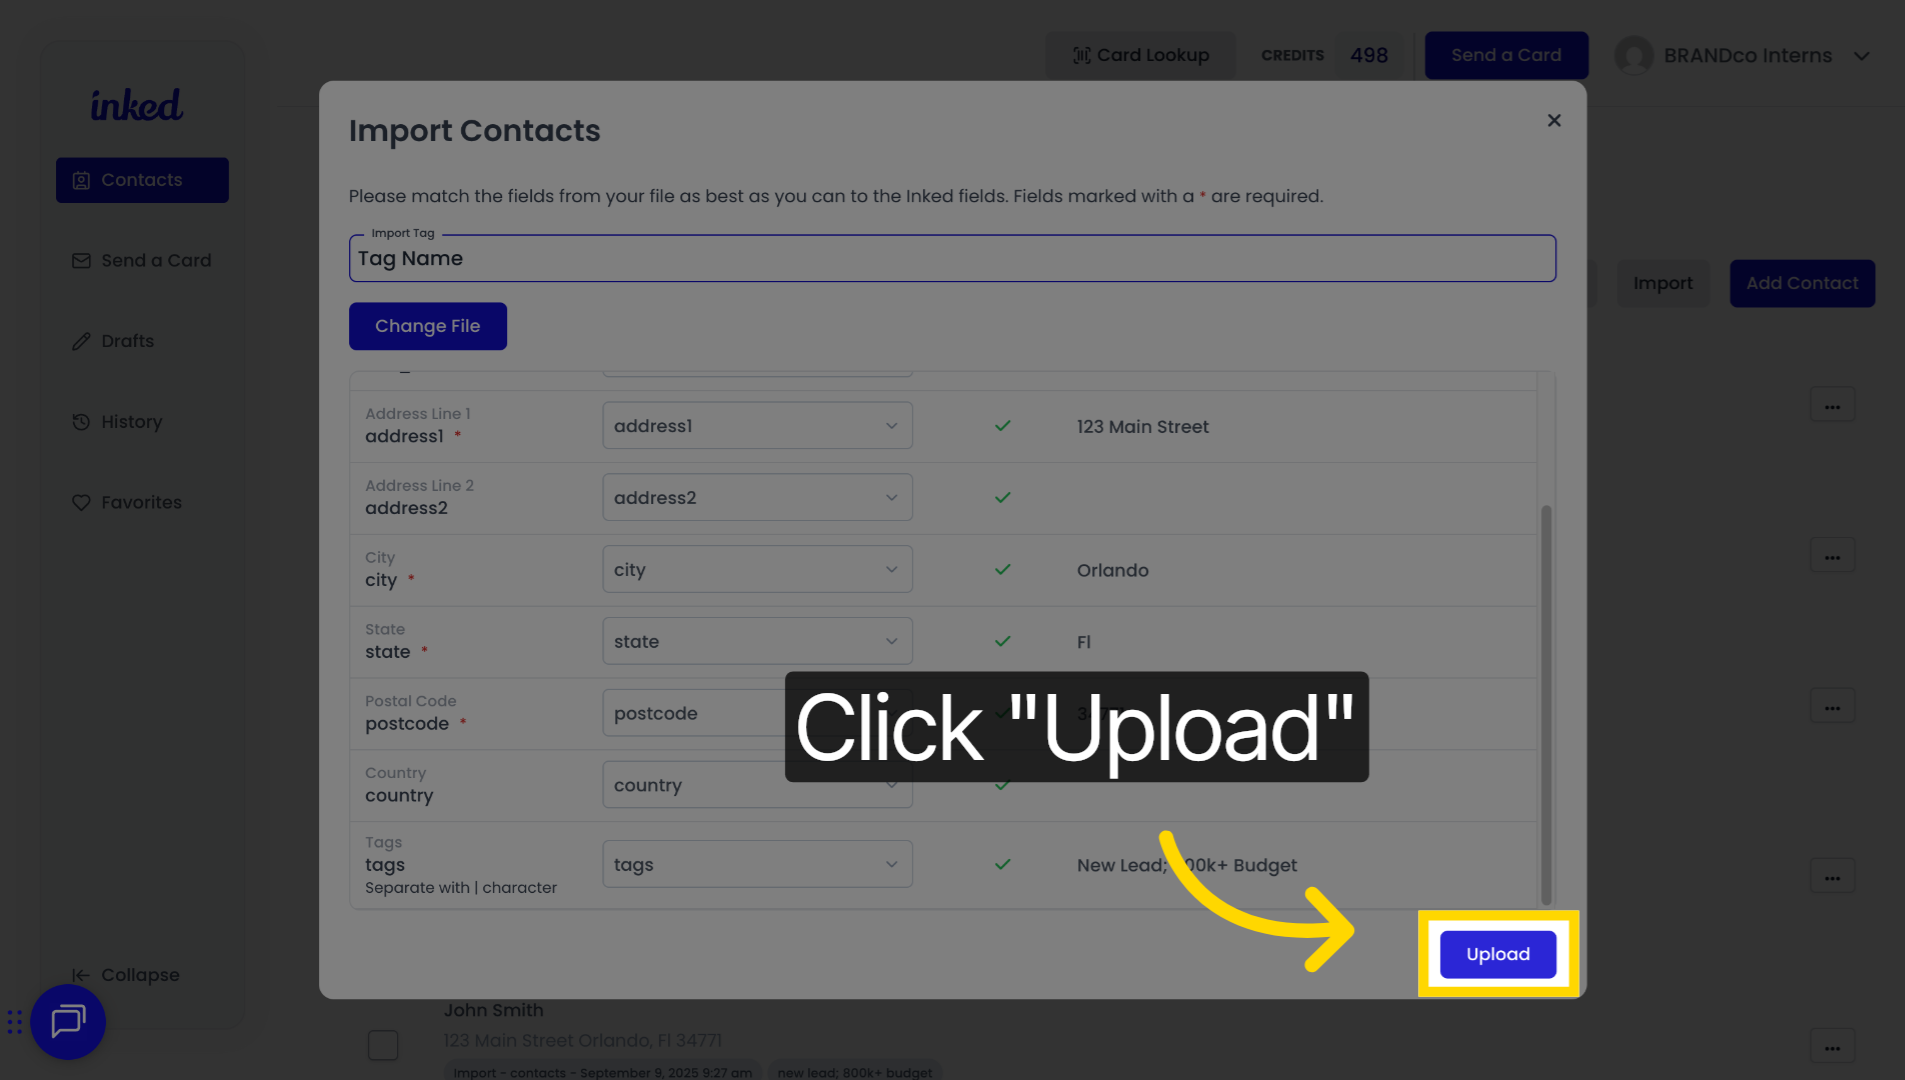
4. Verify Contacts
After uploading ink will prompt you to match your files columns with the corresponding fields in Inked. Also known as mapping for example, make sure that your first name column connects to inks first name field. Take a moment to carefully review these matches so that your contacts import correctly, you will also have the opportunity to add a group input tag at the top.
5. Click "Upload"
If everything looks good, click upload the finalized into a process, your file and you'll receive a confirmation. Once. The import is complete.
By following these steps and using our sample CSV when needed, you'll save time, avoid errors and keep your contact list organized. That's it, you successfully imported your contacts into Inc.