Skip to content
  • There are no suggestions because the search field is empty.

How to Add or Change Your Return Address

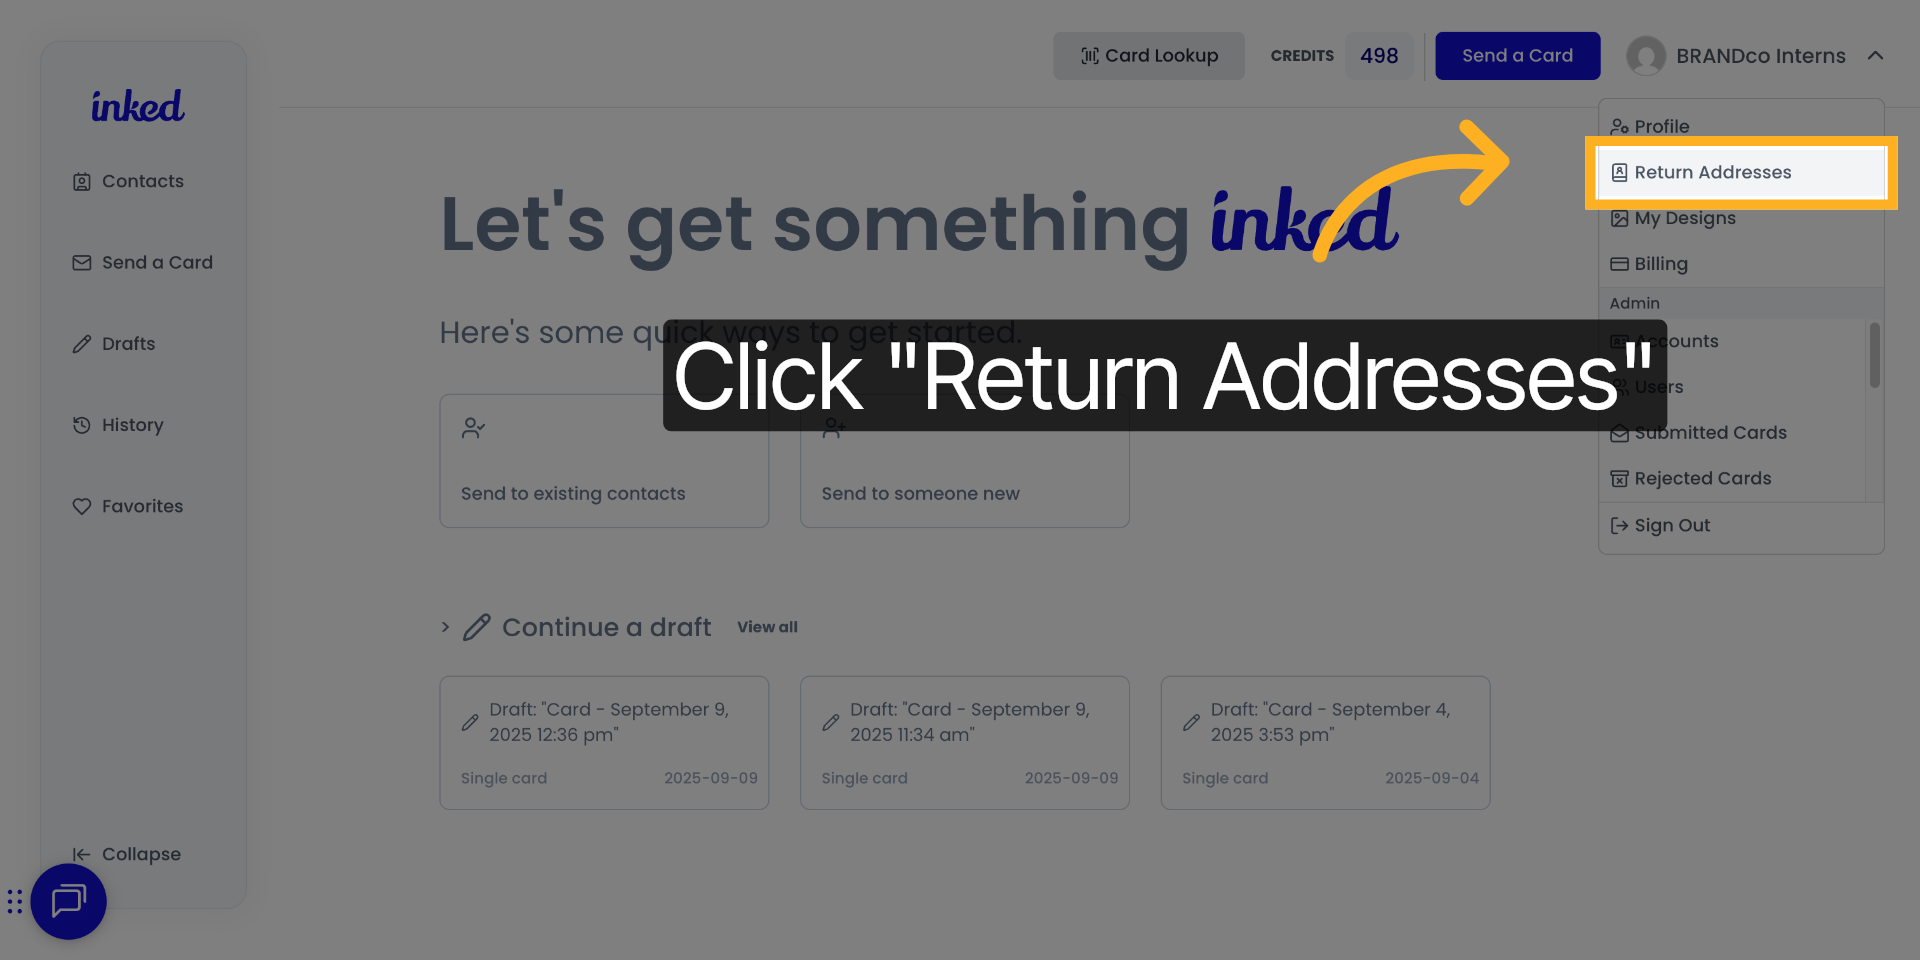
There are two ways to add or update a return address within your Inked account. Both methods are quick, but depending on where you are in the platform, one might be more convenient than the other.

How to change your return address

Adding a return address in ink takes less than a minute. Let me show you how

Go to app.inked.com

1. Click Your Profile

To begin, click your profile in the upper right hand corner. You should see a drop-down menu.
Click Your Profile

2. Click "Return Addresses"

From the drop-down menu. Choose return addresses.
Click 'Return Addresses'

3. Click "Add Address"

Once inside the return addresses window, make sure to click add addresses in the upper right hand corner.
Click 'Add Address'

4. Click "Name"

You will need to go through the steps of adding their name.
Click 'Name'

5. Click "Address"

Adding the return address.
Click 'Address'

6. Click "City"

Adding the city.
Click 'City'

7. Add State

We're going to adding the state.
Add State

8. Click "Postal Code"

And finally adding their zip code.
Click 'Postal Code'

9. Click here

If you would like this return address to be your default return address, click that little box at the bottom left hand side of the panel. Please note that clicking this will override your current return address.
Click here

10. Click "Save Address"

Once you have confirmed that all of the information is correct, you can click save address.
Click 'Save Address'
Congratulations. You have successfully updated your return address in Inked.


Inked Logo

Address

7100 TPC DR STE 700
ORLANDO, FL 32822

Contact

407-499-3000

hello@inked.com

More Info

Privacy Policy

Terms of Service

© BRANDco., LLC 2025. All Rights Reserved Worldwide